Gears of War: E-Day Secondary Objectives Guide – All 17 Side Missions
Complete all 17 Secondary Objectives in Gears of War: E-Day with Act-by-Act locations, starting landmarks, unlock timing, completion steps and missable warnings for the Side Piece achievement.
There are 17 Secondary Objectives in the Gears of War: E-Day Campaign. They are optional side missions found during the larger exploration chapters, and completing all 17 on any difficulty unlocks the Side Piece achievement.
The side missions are concentrated entirely in Acts 2–4:
| Act | Secondary Objectives | Where They Appear |
|---|---|---|
| Act 1 | 0 | None |
| Act 2 | 7 | Chapter 2: Hold the Line |
| Act 3 | 3 | Chapter 3: Last Foothold |
| Act 4 | 7 | Chapter 1: Hope and Ruin (3), Chapter 3: Tough as Nails (4) |
| Act 5 | 0 | None |
| Total | 17 |
Secondary Objectives are not always available the first time you enter an area. Some only activate after a nearby story objective changes, so an inactive door or empty location does not necessarily mean you have missed the mission.
When you approach one, accept the Secondary Objective prompt, complete the required defense, rescue, escort or interaction, and wait for the objective-complete notification or concluding dialogue before leaving.
Side Piece: Complete every Secondary Objective in the Campaign on any difficulty.
Act 2 Secondary Objectives – 7 Side Missions
All seven Act 2 Secondary Objectives are found in Chapter 2: Hold the Line. Because the chapter changes its accessible routes several times, it is best to clear each group before progressing into the next story stage.
Act 2 Secondary Objective Checklist
| # | Secondary Objective | Starting Landmark | When It Becomes Available | What Completes It | Point-of-No-Return Warning |
|---|---|---|---|---|---|
| 1 | The Vanguard | Car dealership / gas-station opening area | After collecting the map and waiting for the truck to move near the start of Hold the Line | Speak to the COG soldier, accept the task, then destroy the E-Hole and defeat every attacker | Do it before leaving the opening Hold the Line area and moving deeper into the chapter |
| 2 | Trapped Family | Last Dollar parking area | During the opening Hold the Line exploration section | Clear the attackers, raise the right-hand shutter, go behind the counter and press the button beside the cash register to rescue the family | Complete it before progressing out of the first open section |
| 3 | Apartment SOS | Apartments displaying the HELP banner | Once Hold the Line Part 2 opens the larger central district | Reach the survivors in the upper apartment, breach the route out and kill the Locust attacking the stairway until the survivors can get downstairs safely | Finish it before the story moves you out of the central district toward the Charlie Squad transition |
| 4 | Lost in Translation | Major Burger near the police-station area | After completing Amberstone Storage Facility, while the main objective is Find Mags' Meds | Speak with the two civilians and escort them through the Locust ambushes until both reach the shelter | This mission is story-gated; do not leave the Find Mags' Meds portion of the district without completing it |
| 5 | Family Reunion | Shelter 13 | After leaving Mags' apartment and while the story is preparing you to link up with Charlie Squad | Accept the shelter defense and defeat the attacking Locust; remain until the concluding dialogue / completion notification | Complete this before linking up with Charlie Squad |
| 6 | Black Raven Down | Major Burger beneath the overhead rail near the Kalona Hotel area | During the final Hold the Line exploration stage while searching around the Whiskey Squad / hotel district | Speak to the wounded Gear and defeat the Locust that attack the position | Do it before committing to the Kalona Hotel story route and the end of Hold the Line |
| 7 | Lone Wolf | Library-side apartments, at the elevator | The elevator objective becomes accessible after completing the courtyard main objective | Use the elevator, reach the stranded COG sniper and help defeat the Locust attacking the upper floors | Return to the apartments as soon as the elevator becomes active; finish it before the final hotel / chapter transition |
The Vanguard
After the map pickup at the start of Hold the Line, wait for the vehicle blocking the route to move and search the opening commercial area.
The objective starts around the car dealership / gas-station area when you speak to the nearby COG soldier. Once accepted, an E-Hole opens and Locust attack the position.
Destroy the E-Hole and clear every remaining enemy. Do not leave as soon as the largest group dies; wait until the task actually registers as complete.
Trapped Family
Continue through the opening district until you hear calls for help around the Last Dollar store.
Clear the enemies in the parking area, then face the building and raise the shutter on the right. Move through the interior and go behind the counter.
Use the button beside the cash register to release the trapped family. The rescue interaction is what finishes the objective, so clearing the enemies outside by itself is not enough.
Apartment SOS
This objective appears once Hold the Line expands into its larger Part 2 district.
Look for the apartment building with the HELP banner. Reach the survivors in the upper apartment and speak with them, then breach the route out.
Fight your way down through the stairwell and kill every Locust blocking the escape. Stay with the sequence until the survivors successfully make it downstairs and the mission completes.
Lost in Translation
This one is particularly easy to check too early.
First complete the Amberstone Storage Facility story section. When the main objective changes to Find Mags' Meds, return to the Major Burger near the police-station area.
Speak with the two civilians inside to start the escort. Follow them toward the shelter and clear each Locust ambush as it appears. If the civilians stop moving, search the surrounding area for an enemy that has not been killed yet.
The mission completes when both civilians safely reach the shelter.
Family Reunion
After the Mags' apartment story sequence, head toward Shelter 13 instead of going directly to the Charlie Squad rendezvous.
Accept the objective and defend the shelter from the incoming Locust. Stay in the area after the main wave is defeated and allow the final encounter/dialogue to finish.
This is one of the most important timing warnings in Act 2: complete Family Reunion before linking up with Charlie Squad.
Black Raven Down
During Hold the Line's final exploration stage, head toward the Major Burger beneath the overhead rail around the Kalona Hotel side of the district.
You will find a wounded Gear associated with the downed Raven. Speak to him to accept the task, then defend the area from the incoming Locust.
Kill the full attacking group and wait for the mission to complete before moving toward the hotel.
Lone Wolf
Lone Wolf cannot be completed the first time you pass the library-side apartments.
Progress the main story through the nearby courtyard objective, then return to the apartments to the left of the library steps. The elevator interaction should now be available.
Use the elevator, reach the upper floors and help the isolated COG sniper defeat the Locust.
This objective is also important for collectible cleanup because the route gives you access to the COG Tags of Sergeant Elijah Adams.
Act 3 Secondary Objectives – 3 Side Missions
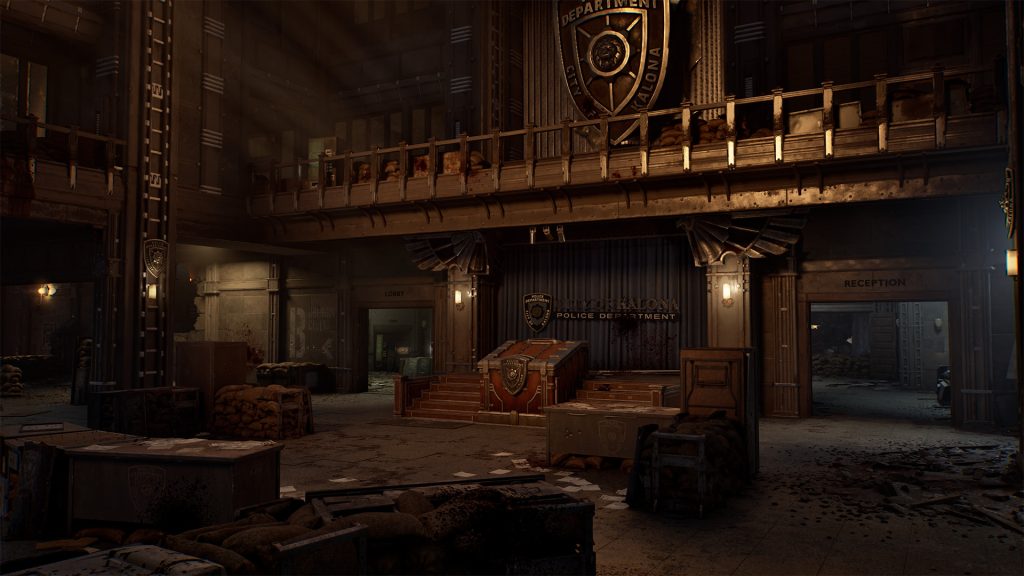
All three Act 3 Secondary Objectives are in Chapter 3: Last Foothold.
The chapter opens into another large section of Kalona around the police station, hospital and hotel. Finish all three optional missions before following the final story route out of the district.
Act 3 Secondary Objective Checklist
| # | Secondary Objective | Starting Landmark | When It Becomes Available | What Completes It | Point-of-No-Return Warning |
|---|---|---|---|---|---|
| 1 | Weak Signal | Loading bay across from the police station | When the police-station / hospital side of Last Foothold opens for exploration | Enter the loading bay, trigger the task from the rear-right area and defeat every incoming Locust | Finish it before leaving the open Last Foothold district |
| 2 | Lost in the Park | Park beside the Kalona Hotel | After the convoy-loading story section and the Spore Matron encounter | Enter the park, clear the Locust and finish rescuing the civilian below the steps | Do it before pushing beyond the hotel / park story route |
| 3 | Rooftop Mayday | Red-tarpaulin gate southeast of Landa Memorial Hospital | Late in Last Foothold after the surrounding story objectives have advanced and the hospital-side route opens | Go through the gate, climb to the rooftop, defeat the enemies including the Reaver, unlock the route and wait for the rescue to finish | This appears late; return to the hospital side and complete it before the chapter-ending route |
Weak Signal
Go to the loading bay across from the police station, just south of the hospital area.
Move into the loading bay and head toward the rear-right section to trigger the Secondary Objective.
The mission is a defensive fight. Hold the position and eliminate the Locust waves until the objective completes.
Lost in the Park
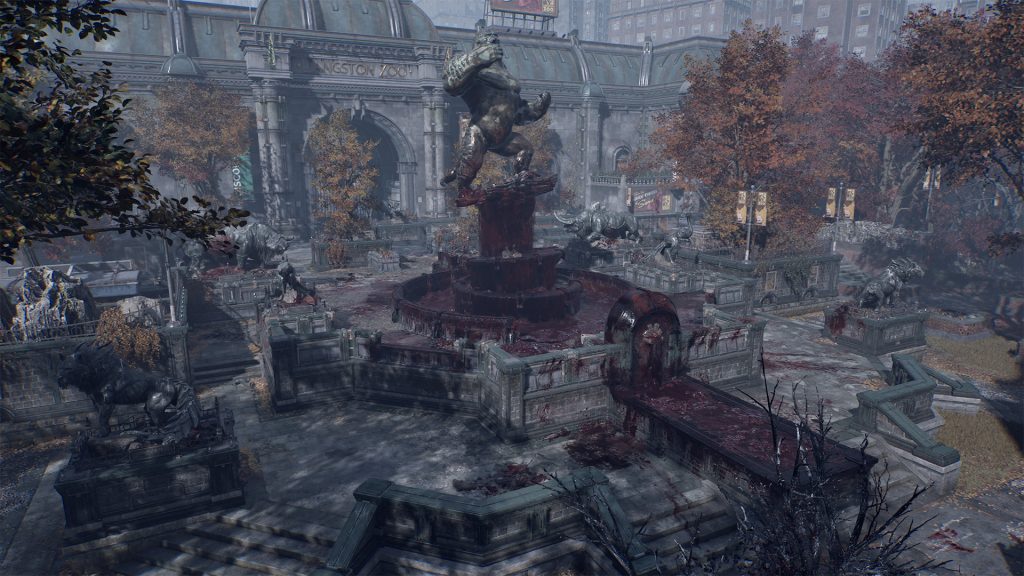
Progress Last Foothold until you have helped load the convoy and dealt with the Spore Matrons.
From the Kalona Hotel side of the district, enter the nearby park and move down toward the civilian below the steps.
Clear all Locust inside the park and finish helping the civilian. Stay until the mission registers as complete.
Do not skip this objective if you are also working on the standard collectibles: the park route gives access to the Damaged Heavy Locust Helmet.
Rooftop Mayday
Rooftop Mayday becomes relevant later in the chapter.
Return to the Landa Memorial Hospital side of the district and find the gate covered by red tarpaulin southeast of the hospital. Go through and climb the stairs toward the rooftop.
Clear the rooftop encounter, including the Reaver, then complete the rescue and open the route as required.
Wait for the completion notification before leaving. This side mission also opens the route used to obtain the Blade-like Projectiles collectible.
Act 4 Secondary Objectives – 7 Side Missions
Act 4 splits its seven Secondary Objectives between two chapters:
| Chapter | Secondary Objectives |
|---|---|
| Chapter 1: Hope and Ruin | 3 |
| Chapter 3: Tough as Nails | 4 |
| Total | 7 |
Act 4 is the easiest Act to leave partially complete because the side missions are spread across two different open districts.
Act 4 Chapter 1: Hope and Ruin – 3 Secondary Objectives
Hope and Ruin Checklist
| # | Secondary Objective | Starting Landmark | When It Becomes Available | What Completes It | Point-of-No-Return Warning |
|---|---|---|---|---|---|
| 1 | Missing Convoy | Ground-floor arches in Cooper Commons | While Cooper Commons is open for exploration during Chapter 1 | Accept the convoy task, defeat the Spore Matrons and remaining Locust, then wait for the completion notification | Complete it before following the late Chapter 1 route toward the Opera House / chapter transition |
| 2 | R.I.G.S. Experiment | Building behind the courtyard where Dale Maddoc's tags are found | While exploring Kalona Square / Cooper Commons during Chapter 1 | Accept the task, activate the experiment machine and defend it until the test finishes | Clear it while the Chapter 1 district is still freely explorable |
| 3 | Clocktower Defense | Clocktower on the road beside the Opera House | Once you reach the Opera House side of the open district | Accept the task and defeat the attacking waves around the clocktower until the defense completes | Do it before committing to the Opera House story progression and leaving the open district |
Missing Convoy
Search the southern side of Cooper Commons and approach the ground-floor arches around the courtyard area.
Accept the convoy-related task and follow the objective into the combat encounter.
Defeat the Spore Matrons and the rest of the Locust in the area. Remain at the objective until the game confirms completion rather than leaving after the largest enemies fall.
R.I.G.S. Experiment
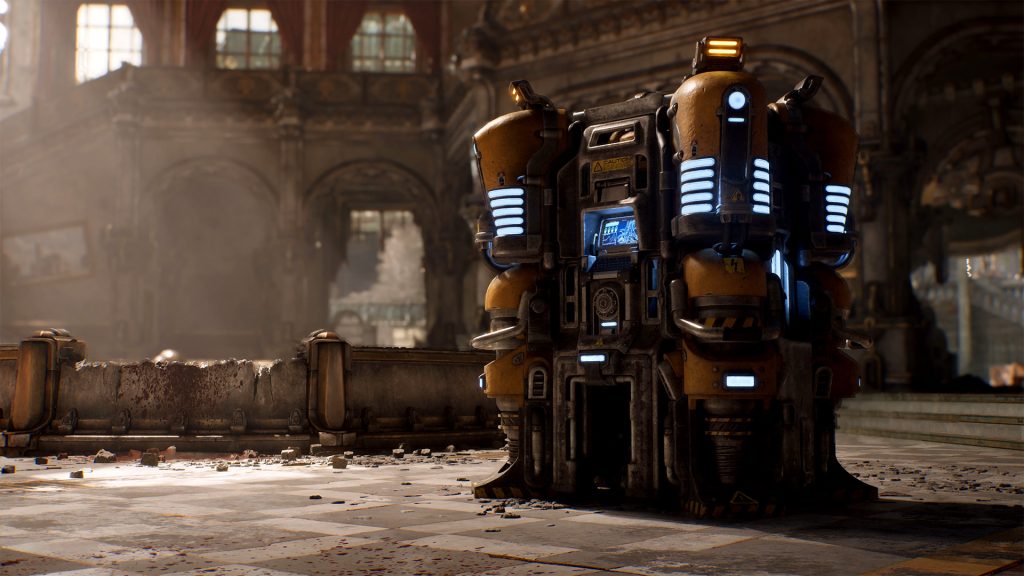
Around the western Kalona Square / Cooper Commons area, look for the building behind the courtyard associated with Specialist Dale Maddoc's COG Tags.
Enter the building and interact with the experiment machine to begin the mission.
Defend the R.I.G.S. experiment from the attacking Locust and keep the position secure until the experiment itself finishes and the objective clears.
Clocktower Defense
When you reach the Opera House district, face the Opera House entrance and follow the road beside it toward the clocktower.
Accept the Secondary Objective and prepare for a defense encounter.
Defeat each wave attacking the clocktower and stay until the task completes. Do this before progressing too far into the Opera House story route.
Act 4 Chapter 3: Tough as Nails – 4 Secondary Objectives
The final four side missions are found around the Gavel Dockyard, rail yard, power-grid and Seradyne factory areas.
Tough as Nails Checklist
| # | Secondary Objective | Starting Landmark | When It Becomes Available | What Completes It | Point-of-No-Return Warning |
|---|---|---|---|---|---|
| 1 | Special Cargo | Workers and cargo route in Gavel Dockyard | Once the Gavel Dockyard opens for exploration | Accept the workers' task, clear the Locust, follow the active marker and open the cargo container | Complete it before leaving the dockyard; it also opens access to a collectible |
| 2 | Fire in the Hole | Raised building near the helipad, east of the Control Tower | During the open Gavel Dockyard / refinery exploration phase | Reach the upper building, accept the task and eliminate the Locust below until the objective completes | Finish it before moving into the later power-grid / final story route |
| 3 | Trapped Locust | First-floor train controls in the central rail-yard building | While the central Gavel Dockyard train area is open | Use the train controls, bring the carriage over, prepare the area, release the trapped Locust and defeat all of them | Do not leave when the fight ends; wait for completion and inspect the opened carriage before moving on |
| 4 | Death from Above | Seradyne / Armadillo factory rooftop | After completing the power-plant / restore-power main objective | Return to the factory roof, accept the task and clear the rooftop enemies until the mission completes | This appears after story progression; return for it before heading to the final Control Tower / chapter-ending route |
Special Cargo
Explore the Gavel Dockyard and find the workers associated with the cargo route.
Accept their task, clear the Locust blocking the route and follow the active objective marker toward the cargo container.
Open the container to finish the mission.
This side mission is worth doing during your collectible run because it also gives access to the Imulsion Blast Charge collectible.
Fire in the Hole
Look for the raised building near the helipad, east of the Control Tower area.
Use the nearby stairs / climbable route to reach the upper position and accept the Secondary Objective.
The mission sends you into a combat encounter with the Locust below. Eliminate the full group and remain until the objective clears.
Trapped Locust
Go to the central rail-yard building and climb to the first-floor train controls.
Accept the mission, use the controls to bring the carriage into position and prepare before releasing the trapped enemies.
Open the carriage and kill every Locust that comes out.
Do not immediately leave the area after the fight. Wait for the Secondary Objective to complete and inspect the now-accessible carriage; the route also opens access to a Hard Case.
Death from Above
This is the Act 4 mission most likely to be missed because it does not become available until after you restore power at the power plant.
Once that main objective is complete, return to the Seradyne / Armadillo factory rooftop.
Accept Death from Above and clear the enemies across the rooftop. Stay in the area until the game confirms the task is finished.
Do this before committing to the final Control Tower / chapter-ending objective.
Side Piece Achievement and Missing Mission Cleanup
Completing all 17 Campaign Secondary Objectives on any difficulty unlocks Side Piece, worth 15 Gamerscore.
If the achievement does not unlock, compare your War Journal against the Act totals first:
| Act | Required |
|---|---|
| Act 2 | 7 |
| Act 3 | 3 |
| Act 4 | 7 |
| Total | 17 |
If Act 2 shows 6/7, check Family Reunion, Lost in Translation and Lone Wolf first because their availability depends on story progression.
If Act 3 is short, return to Last Foothold and check the park and hospital-side rooftop route.
If Act 4 is short, remember that Death from Above only appears after restoring power, while the other three Chapter 3 missions are available earlier around the dockyard.
For standard collectible locations, use the Gears of War: E-Day Collectibles Guide. For all of our walkthroughs, return to the Gears of War: E-Day guide hub.