How to Build an Efficient Base in Palworld 1.0
Learn how to plan an efficient Palworld 1.0 base with better work zones, Pal SAN management, storage, farming, Ranch production, breeding and late-game resource facilities.
A well-planned base is one of the most important parts of Palworld. Your Pals continue producing food, materials, medicine and breeding eggs while you explore, so poor placement or an unbalanced workforce can slow down almost every part of your progression.
Palworld 1.0 changed how bases work. It added new building pieces, water construction, better storage controls, new SAN facilities and late-game production structures. Base Pals also handle repairing, transporting and returning to work more effectively than before.
This guide explains how to use the new systems and arrange an efficient base without wasting space, electricity or Pal work time.
Plan the Base Before Placing Workstations
Start by dividing the base into clear work zones instead of placing every structure wherever it fits.
A practical base can use these areas:
- Central storage: Palbox, Feed Box and frequently used chests
- Production: Workbenches, assembly lines, furnaces and crushers
- Farming: Plantations, Mills and cooking facilities
- Ranch and breeding: Ranches, Breeding Farms and Cake storage
- Power: Generators, Accumulators and high-energy machines
- Pal care: Beds, Hot Springs, Clinics and Monitoring Stands
Keep storage close to the facilities that produce or consume those materials. Shorter routes reduce the time Transporting Pals spend carrying items across the base.
Leave wide paths between large structures. Pals can still become delayed when workstations, stairs, walls or decorative pieces create narrow routes.
Use the New Ancient Building and Decoration Sets
Palworld 1.0 added the Ancient Structure Set alongside new furniture and decorative options.
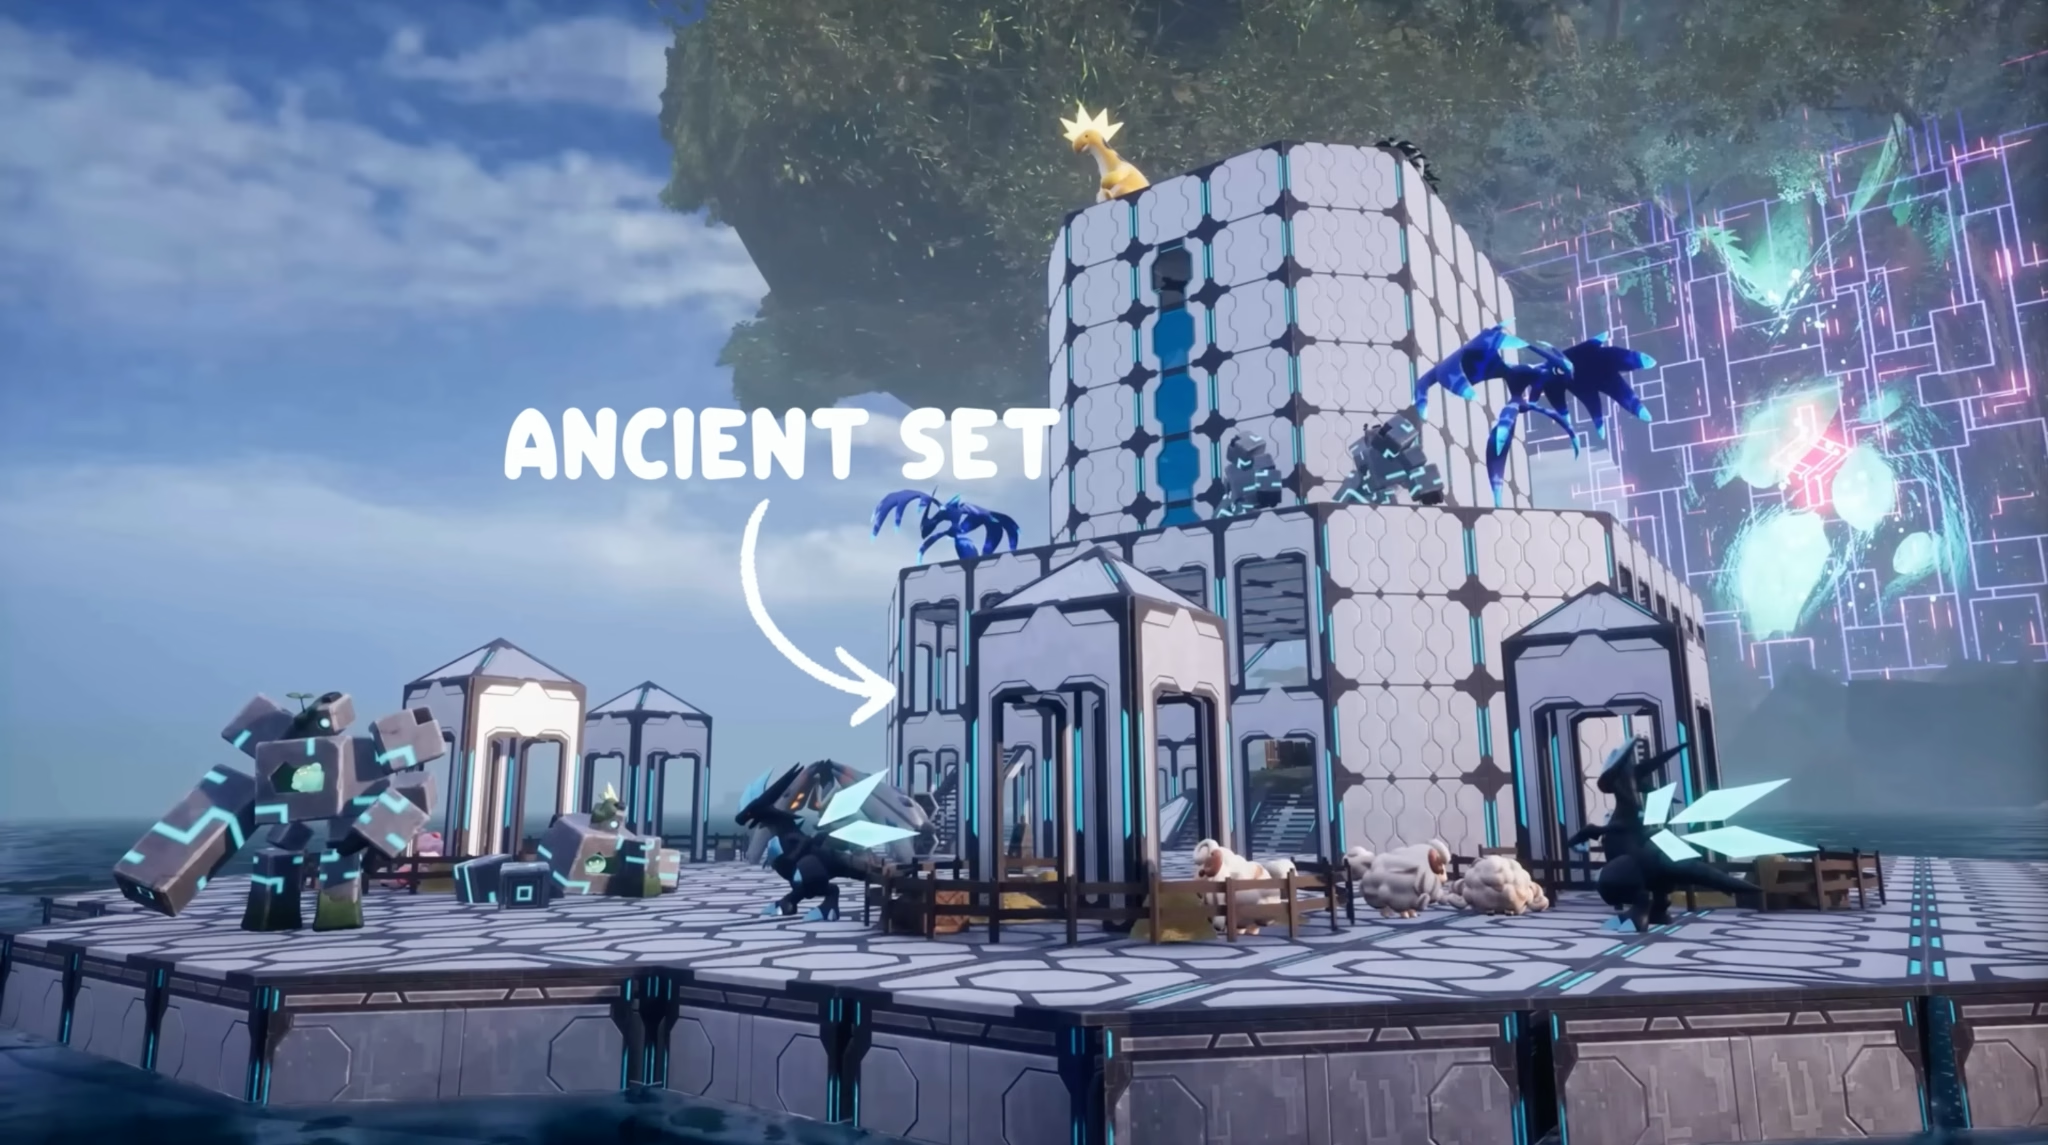
The Faux Greenery sets let you place trees, bushes and plants inspired by different biomes. These decorations are useful for making a base feel less empty, especially around large open production areas.
Build the functional layout first, then decorate the unused edges and upper floors. Avoid placing large trees, rocks or furniture directly beside workstations or narrow entrances where they may interfere with Pal movement.
How to Build Over Water
The Aquatic Construction Kit unlocks at level 66 through Ancient Technology.
You only need to build the kit once. After it is active, you can place supported foundations over water instead of being restricted to normal land.
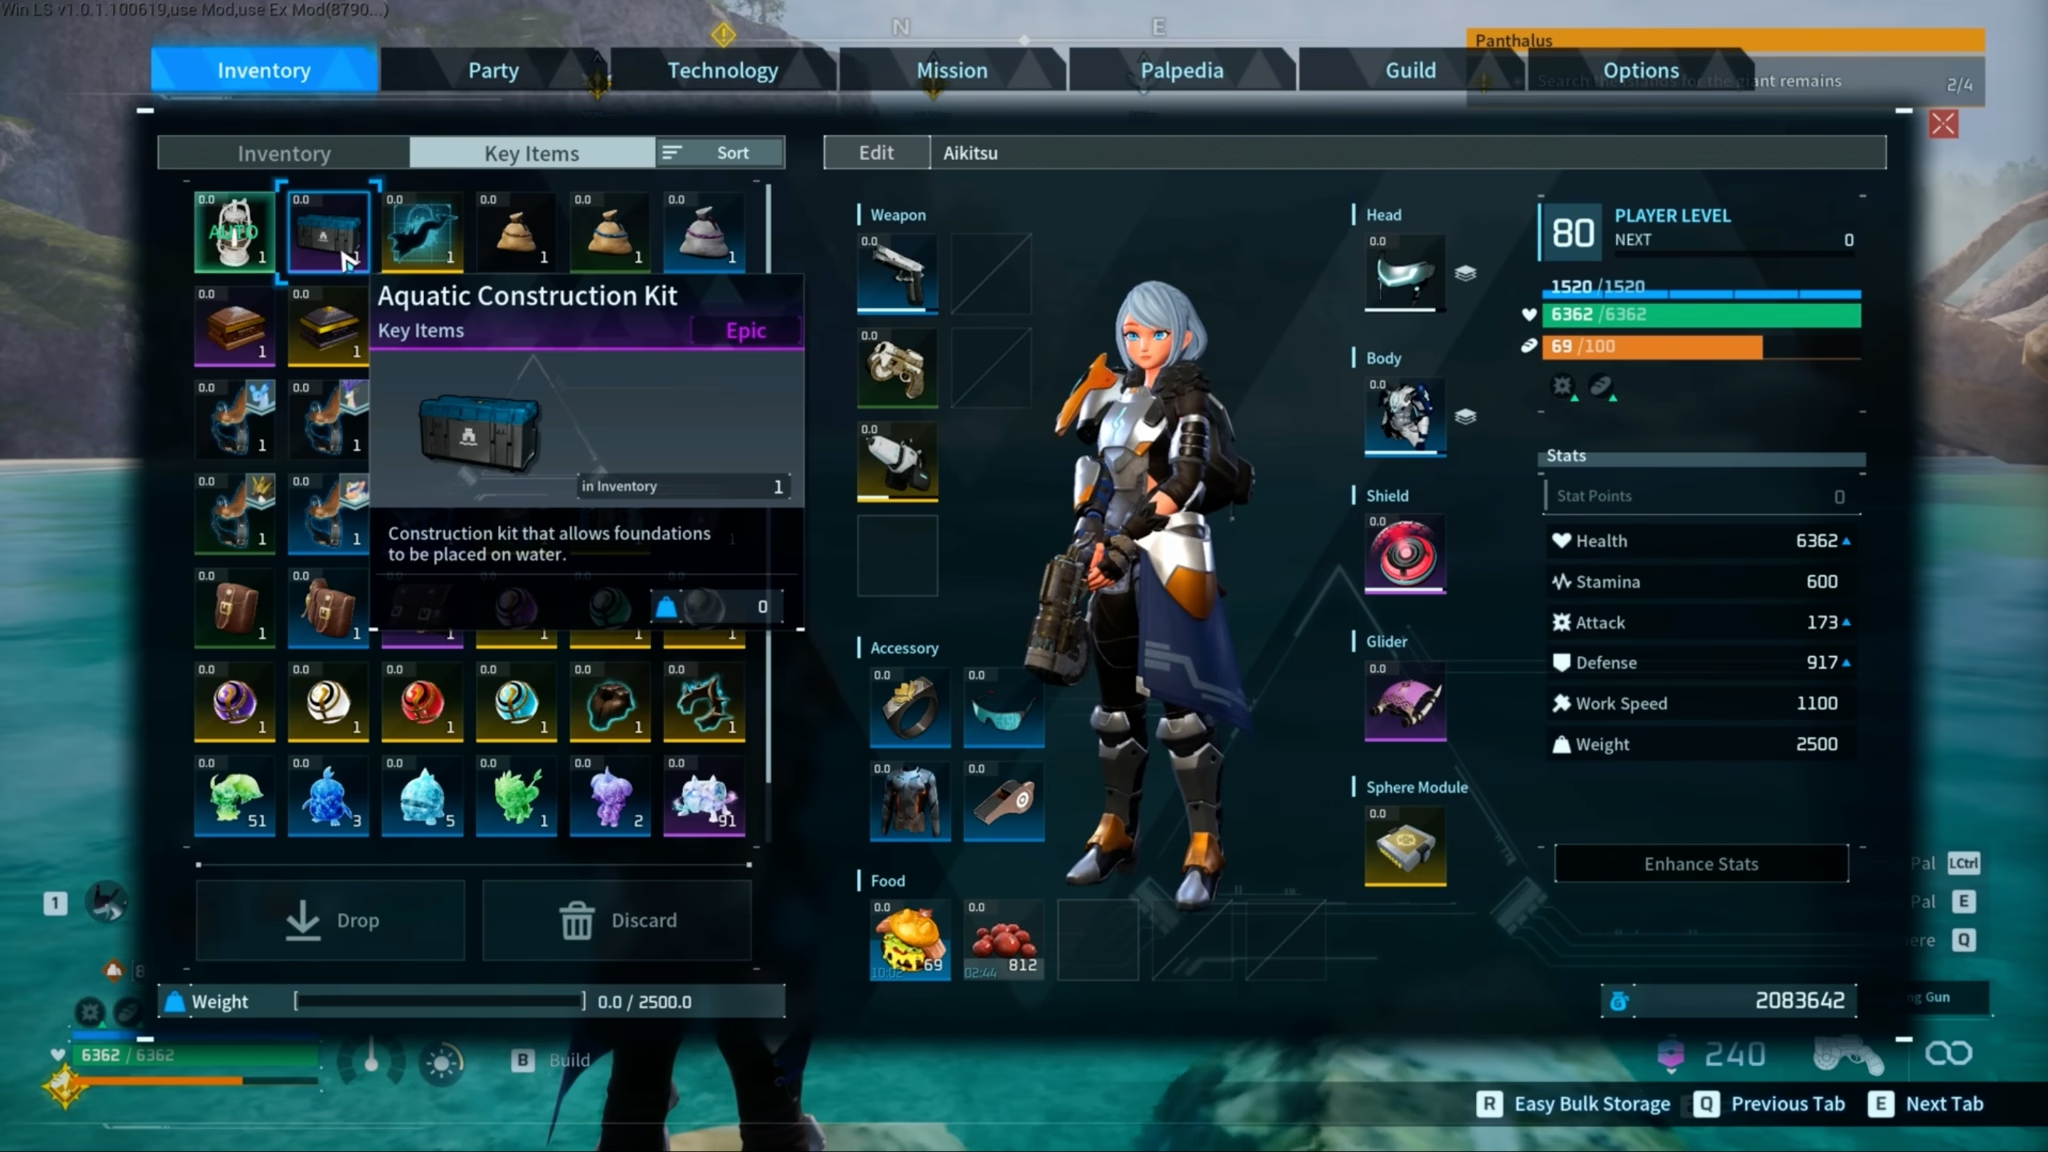
This opens several new base ideas:
- Coastal production bases
- Bases built around small islands
- Ship-style builds
- Wider platforms beyond a narrow shoreline
- Bases with important facilities separated from land entrances
Begin with a simple foundation platform and expand gradually. Make sure the platform leaves enough space for the Palbox, beds, storage and wide travel paths before adding walls or decorations.
Building over water can reduce the amount of natural terrain inside the base, but it does not automatically make every base raid-proof. Keep defensive structures and Pal routes in mind when choosing the final layout.

Use the New Building Quality-of-Life Features
Palworld 1.0 makes building and managing a base easier.
While standing within the base radius, you can fast travel directly from the map without walking back to the Palbox. This is useful in large bases where the Palbox is not beside every production area.
The building menu also has improved categories and search options. Facility information is clearer, including the required Work Suitability and the effect provided by certain structures.
Some lights can now have their colour changed. This is mainly decorative, but it makes it easier to separate rooms or work zones visually.
Let Handiwork Pals Repair the Base
Repair Kits are no longer required for damaged base structures.
Pals with Handiwork can repair damaged structures while assigned to the base without consuming repair items. You should still keep at least one reliable Handiwork Pal at important production or raid bases.
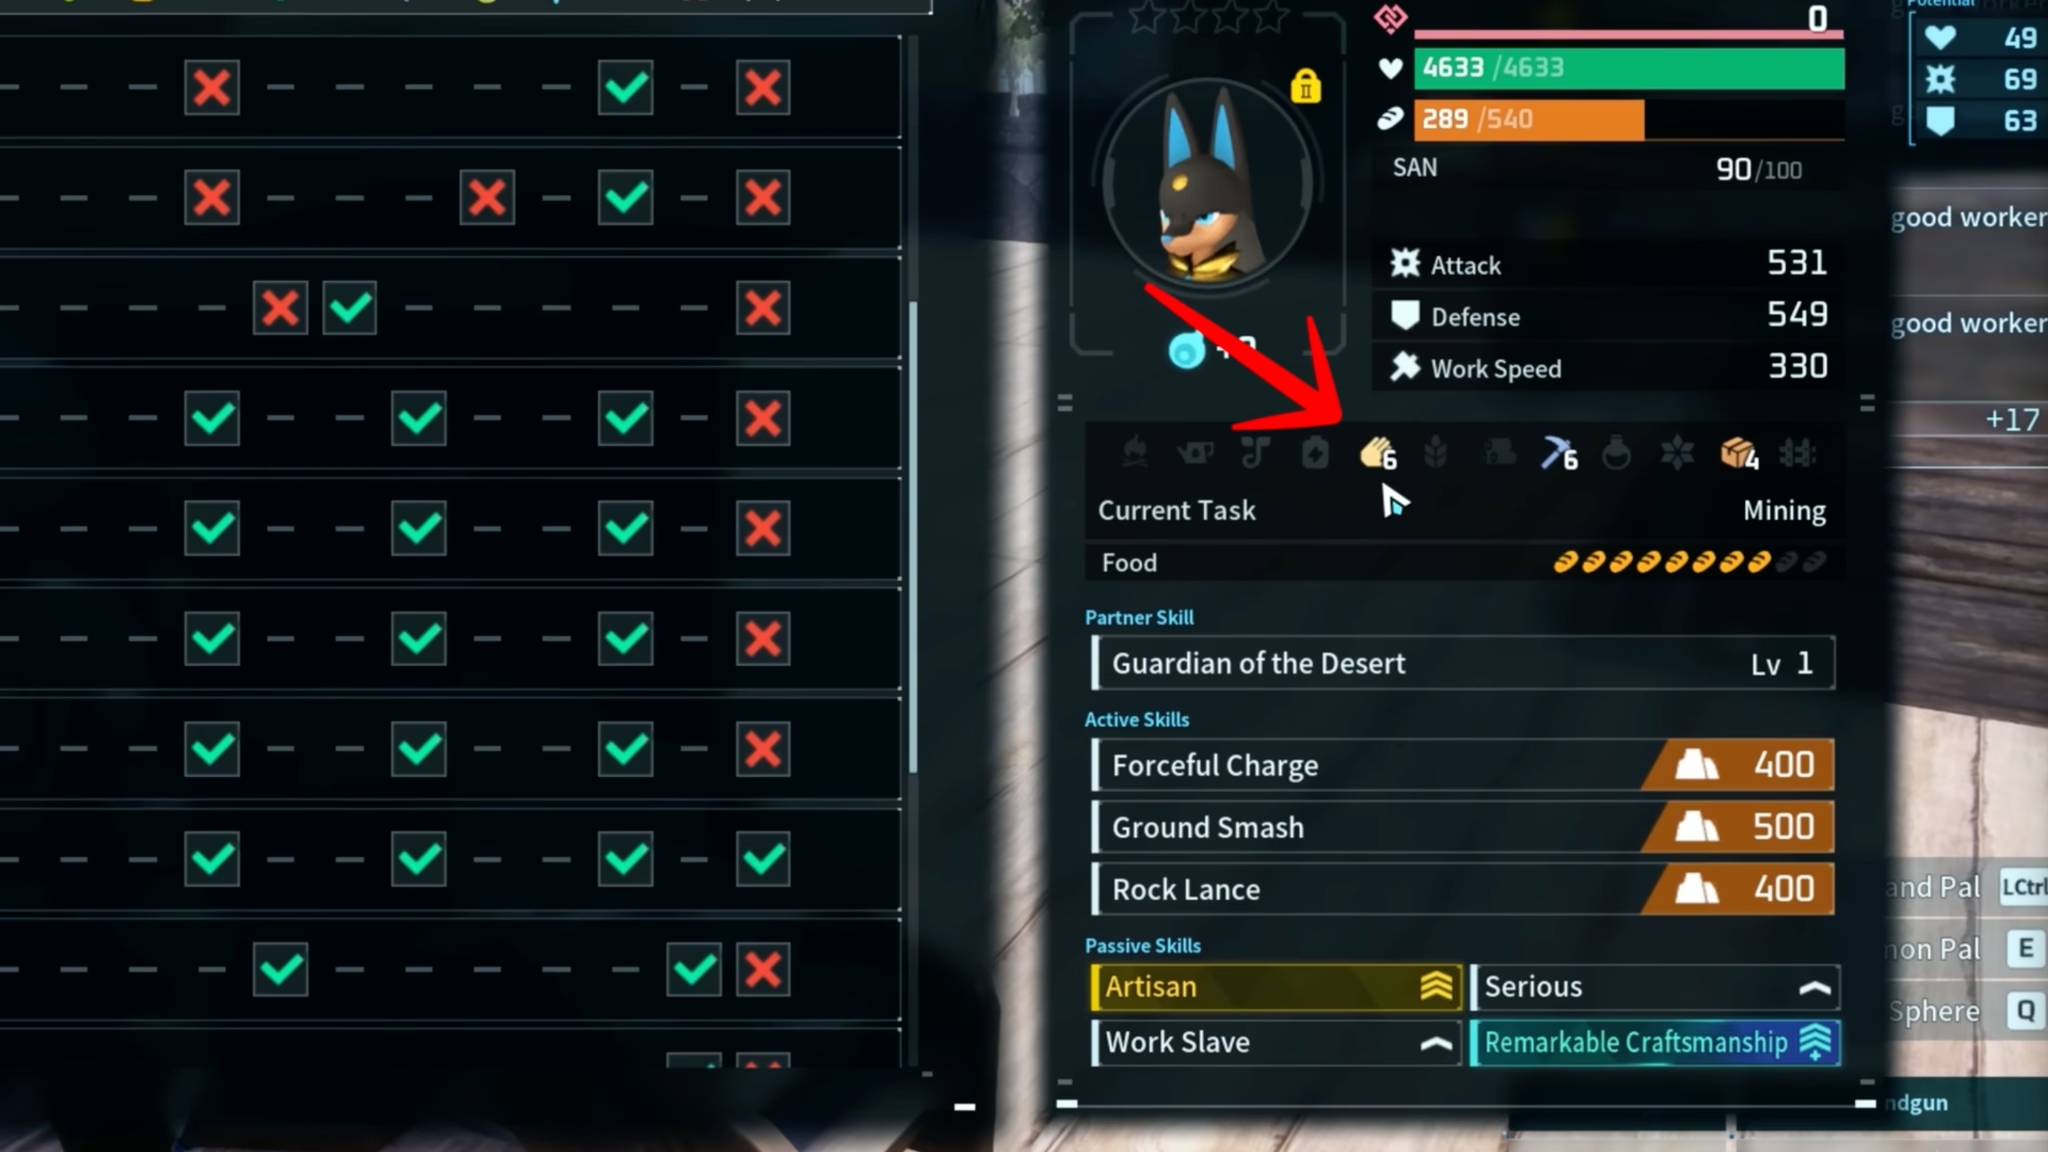
Base Pals also handle work more consistently in 1.0. They are better at returning to unfinished tasks, and Transporting Pals can collect nearby dropped items of the same type from a wider area.
You still need clear routes and enough Transporting workers. Improved behaviour cannot fully compensate for storage placed far away or pathways blocked by structures.
Improve Work Suitability With Base Partner Skills
Several Partner Skills were reworked for Palworld 1.0.
Some Pals can now increase a specific Work Suitability level for all other Pals assigned to the same base. These effects provide a useful early-game boost when you do not yet have enough workers with high natural Work Suitability.
The effect does not stack when using additional copies of the same Pal. Use one supporting Pal, then fill the remaining base slots with workers suited to the jobs you need.
Treat these Partner Skills as support rather than a replacement for specialised workers. A Pal with the correct natural Work Suitability is still important for keeping production consistent.
How to Manage Pal SAN in Version 1.0
Pals lose SAN while working. Heavy workloads and demanding jobs can eventually cause poor conditions, illness or reduced productivity if the base does not provide enough recovery.
Palworld 1.0 added several ways to manage this.
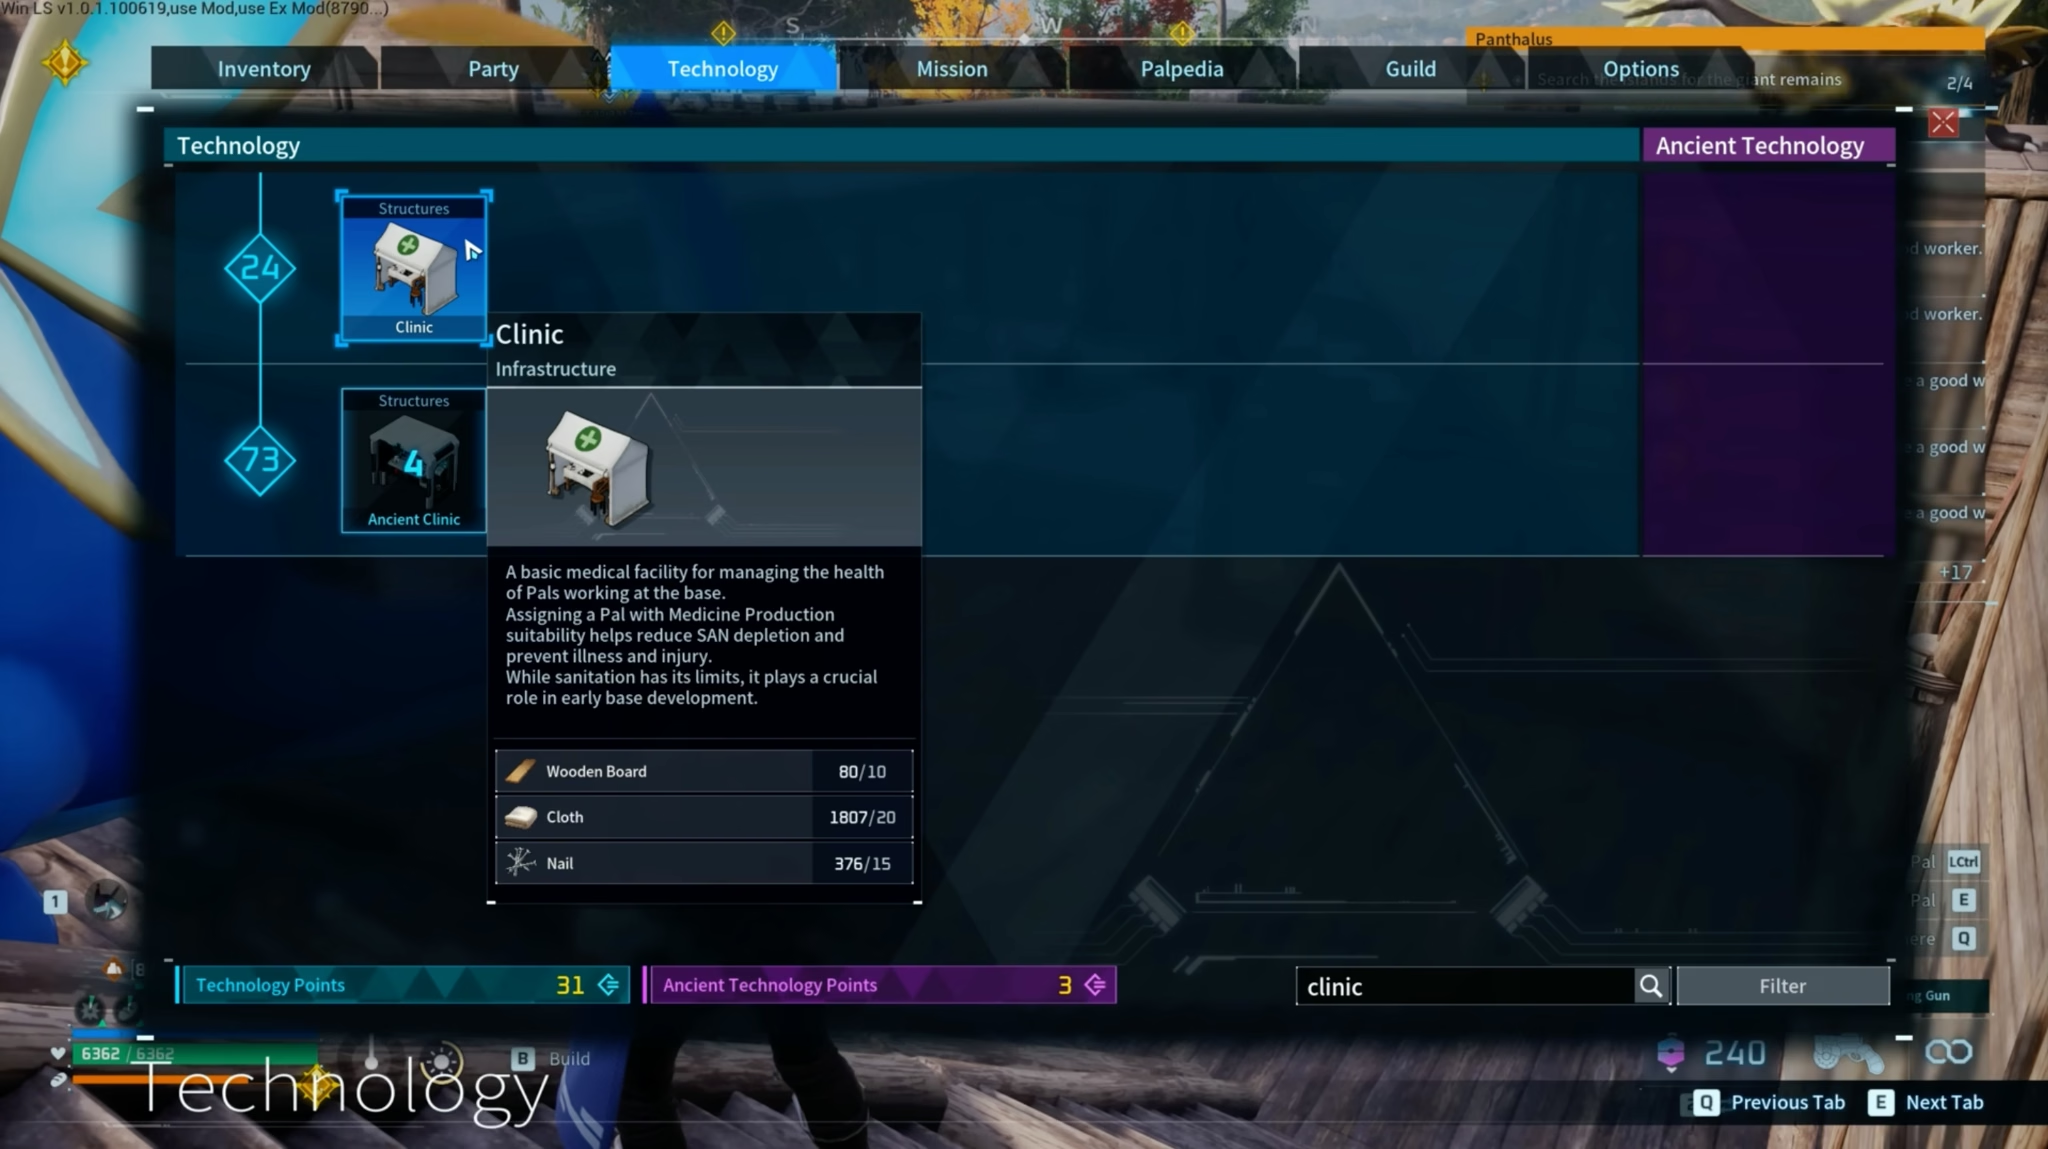
Clinic and Ancient Clinic
Assign a Pal with Medicine Production to the Clinic.
The Clinic reduces SAN depletion and can suppress illness among base Pals. The strength of the effect depends on the Medicine Production level of the assigned Pal.
The Ancient Clinic is the higher-tier version for late-game bases.
High Quality and Ancient Monitoring Stands
The High Quality Monitoring Stand and Ancient Monitoring Stand keep the assignment controls of the normal Monitoring Stand while also reducing SAN depletion.
Use them when you want fixed assignments and additional SAN support in the same base.
Hot Springs
Pals now remain in Hot Springs until their SAN is fully restored before returning to work.
Place Hot Springs close to beds and work areas, but leave enough open space around their entrances. A recovery building is less useful if Pals have difficulty reaching it.
Food Still Matters
Clinics and Monitoring Stands help, but they do not replace good food.
Keep the Feed Box stocked with food that provides useful Nutrition and SAN recovery. Place it somewhere central so workers do not cross the entire base whenever they become hungry.
How to Produce Crude Oil Without an Oil Node
The High-Pressure Crude Oil Extractor unlocks at level 51 through Ancient Technology.
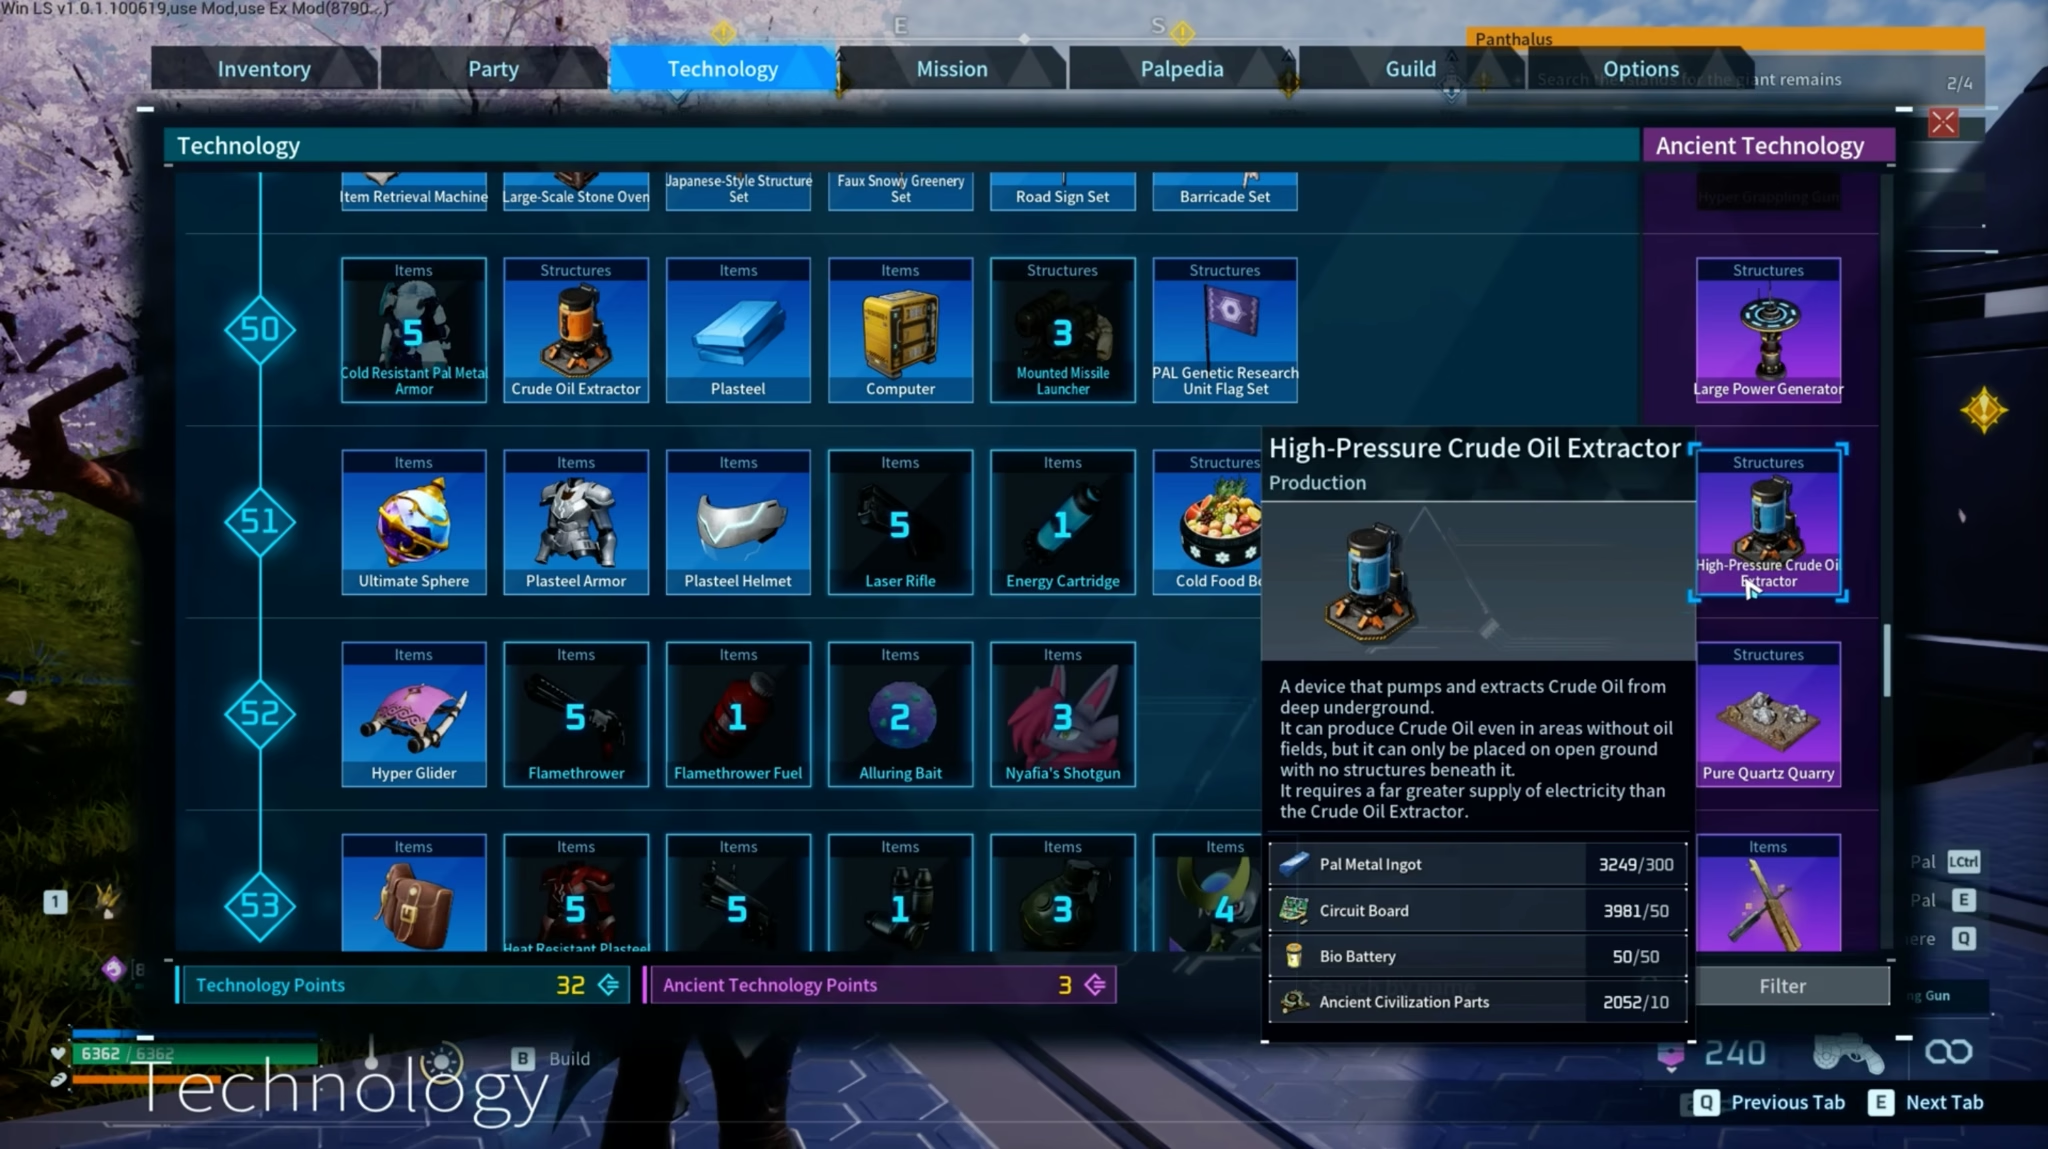
Unlike the normal Crude Oil Extractor, it does not need to be placed directly on an oil field. This gives you more freedom when choosing a production-base location.
The trade-off is its high electricity demand. Do not place one until the base has enough power generation and storage to run it without interrupting other machines.
A reliable setup should include:
- Strong Electricity-generating Pals
- Enough generators for the total workload
- Accumulators to store excess electricity
- Short routes between the extractor and storage
- Space for future high-energy facilities
Place high-power machines in the same area so you can see the base's electricity demand more clearly.
How to Use the Ancient Material Synthesizer
The Ancient Material Synthesizer unlocks at level 78.
It can produce several useful materials, including different types of wood and ore. This makes it valuable for a late-game base that needs a steady supply of several resources without relying entirely on separate natural nodes.
Only build it after preparing the required power and workforce. Adding a late-game machine to an already overloaded base can slow down every other production line.
Keep an output chest nearby so Transporting Pals can clear completed materials quickly.
Organise Storage Around Production
Storage received several major improvements in Palworld 1.0.
You can auto-deposit matching items into a chest without opening it. Quick storage also respects the chest's exclusion settings, making it easier to control where different materials go.
Chests can be named and painted, so use a simple system such as:
- Green for farming ingredients
- Brown for wood and stone
- Grey for ore and ingots
- Red for organs and combat materials
- Blue for technology and ancient materials
The exact colours do not matter. Consistency is more important.
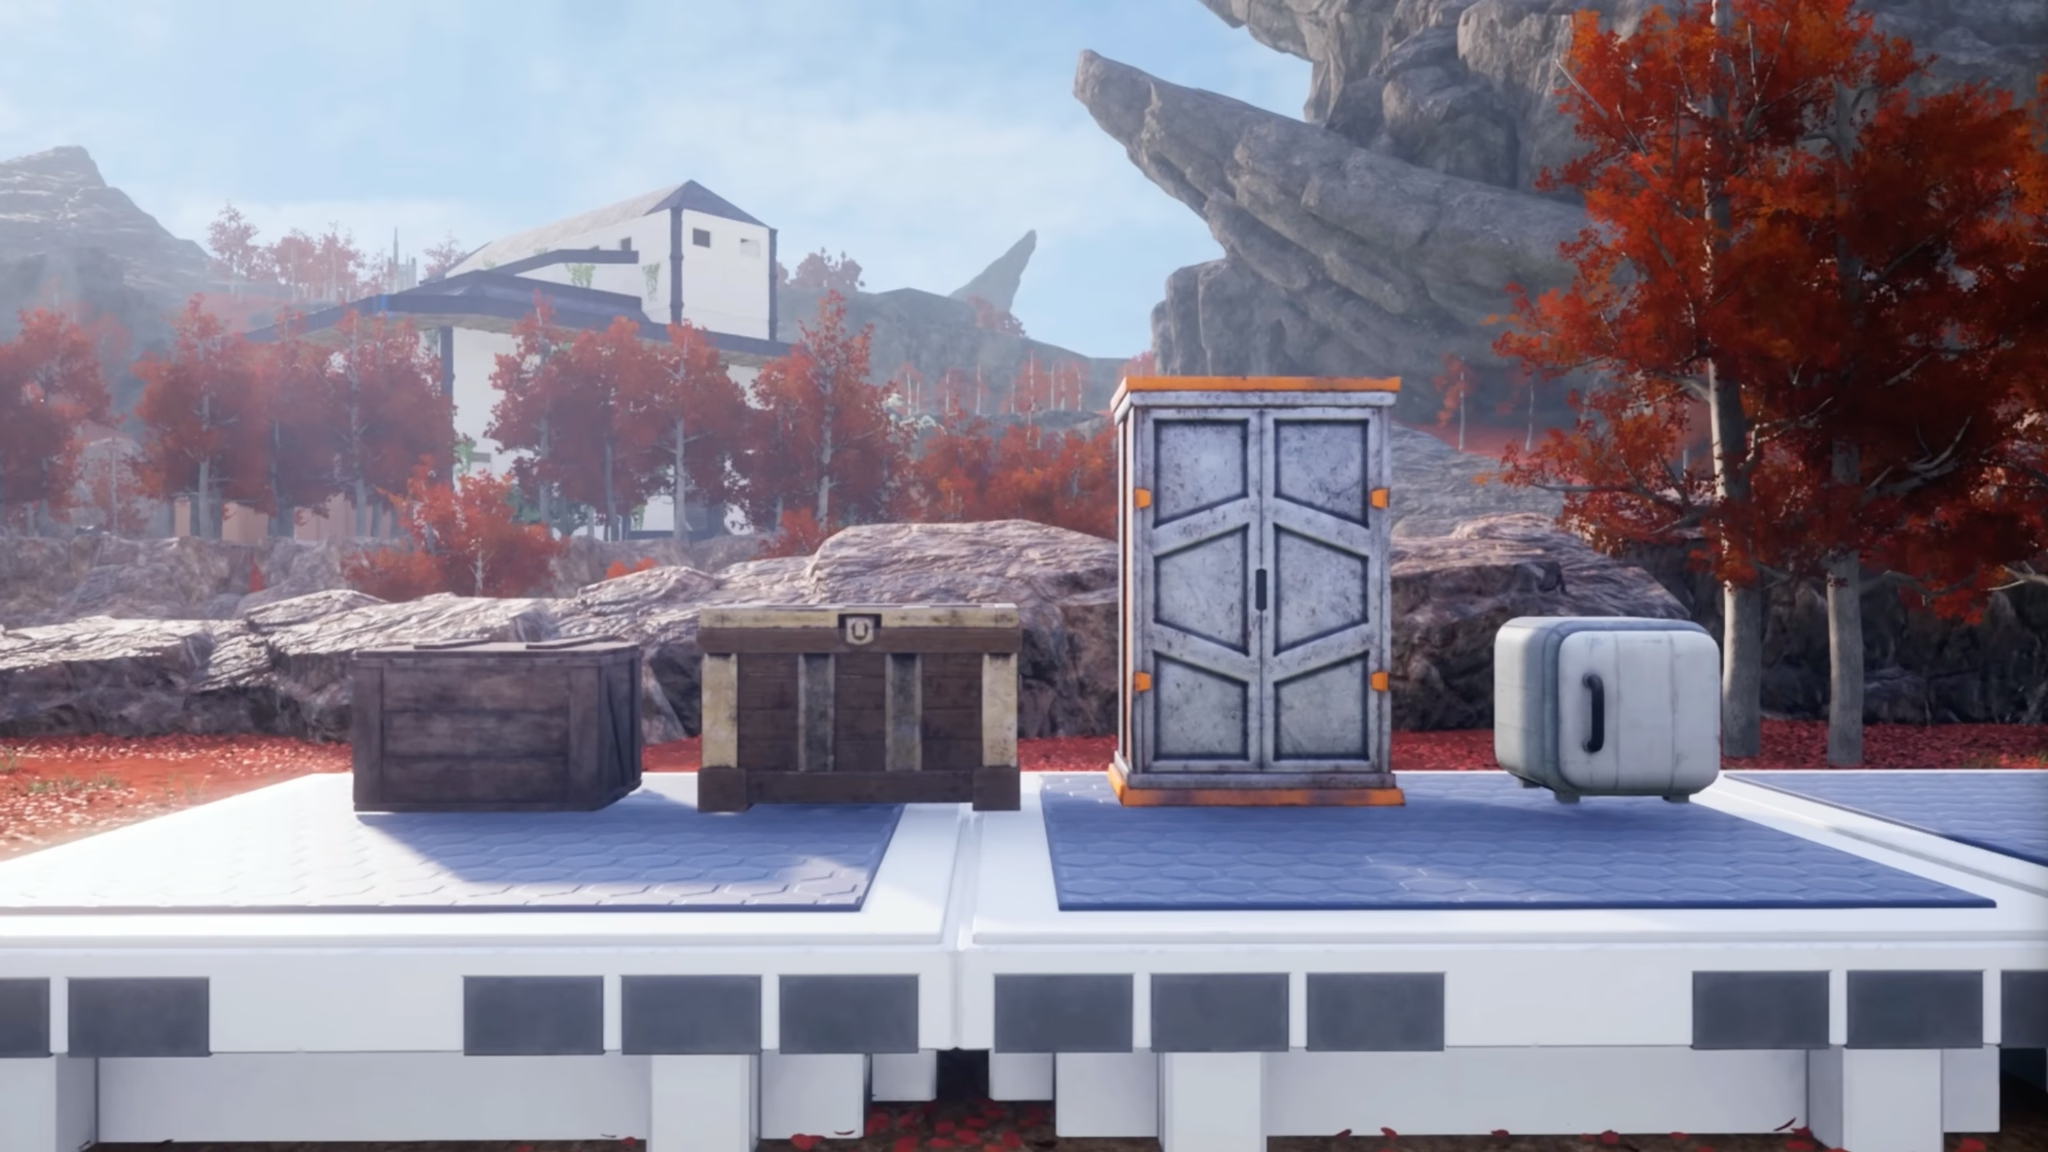
Shopping inside a base can use Gold Coins stored in base chests, and supported facilities such as the Pal Surgery Table can access required items from base storage.
This means you do not need to keep every important material in your personal inventory. Organised shared storage now supports more base activities directly.
Expand Farming for the New Breeding System
Palworld 1.0 includes several Cake types with different breeding benefits.
Because the cakes use different ingredients, a breeding base now needs more than a basic Wheat and Berry setup. Before starting a large project, check which Cake you plan to use and build the plantations, Ranch production and cooking capacity around that recipe.
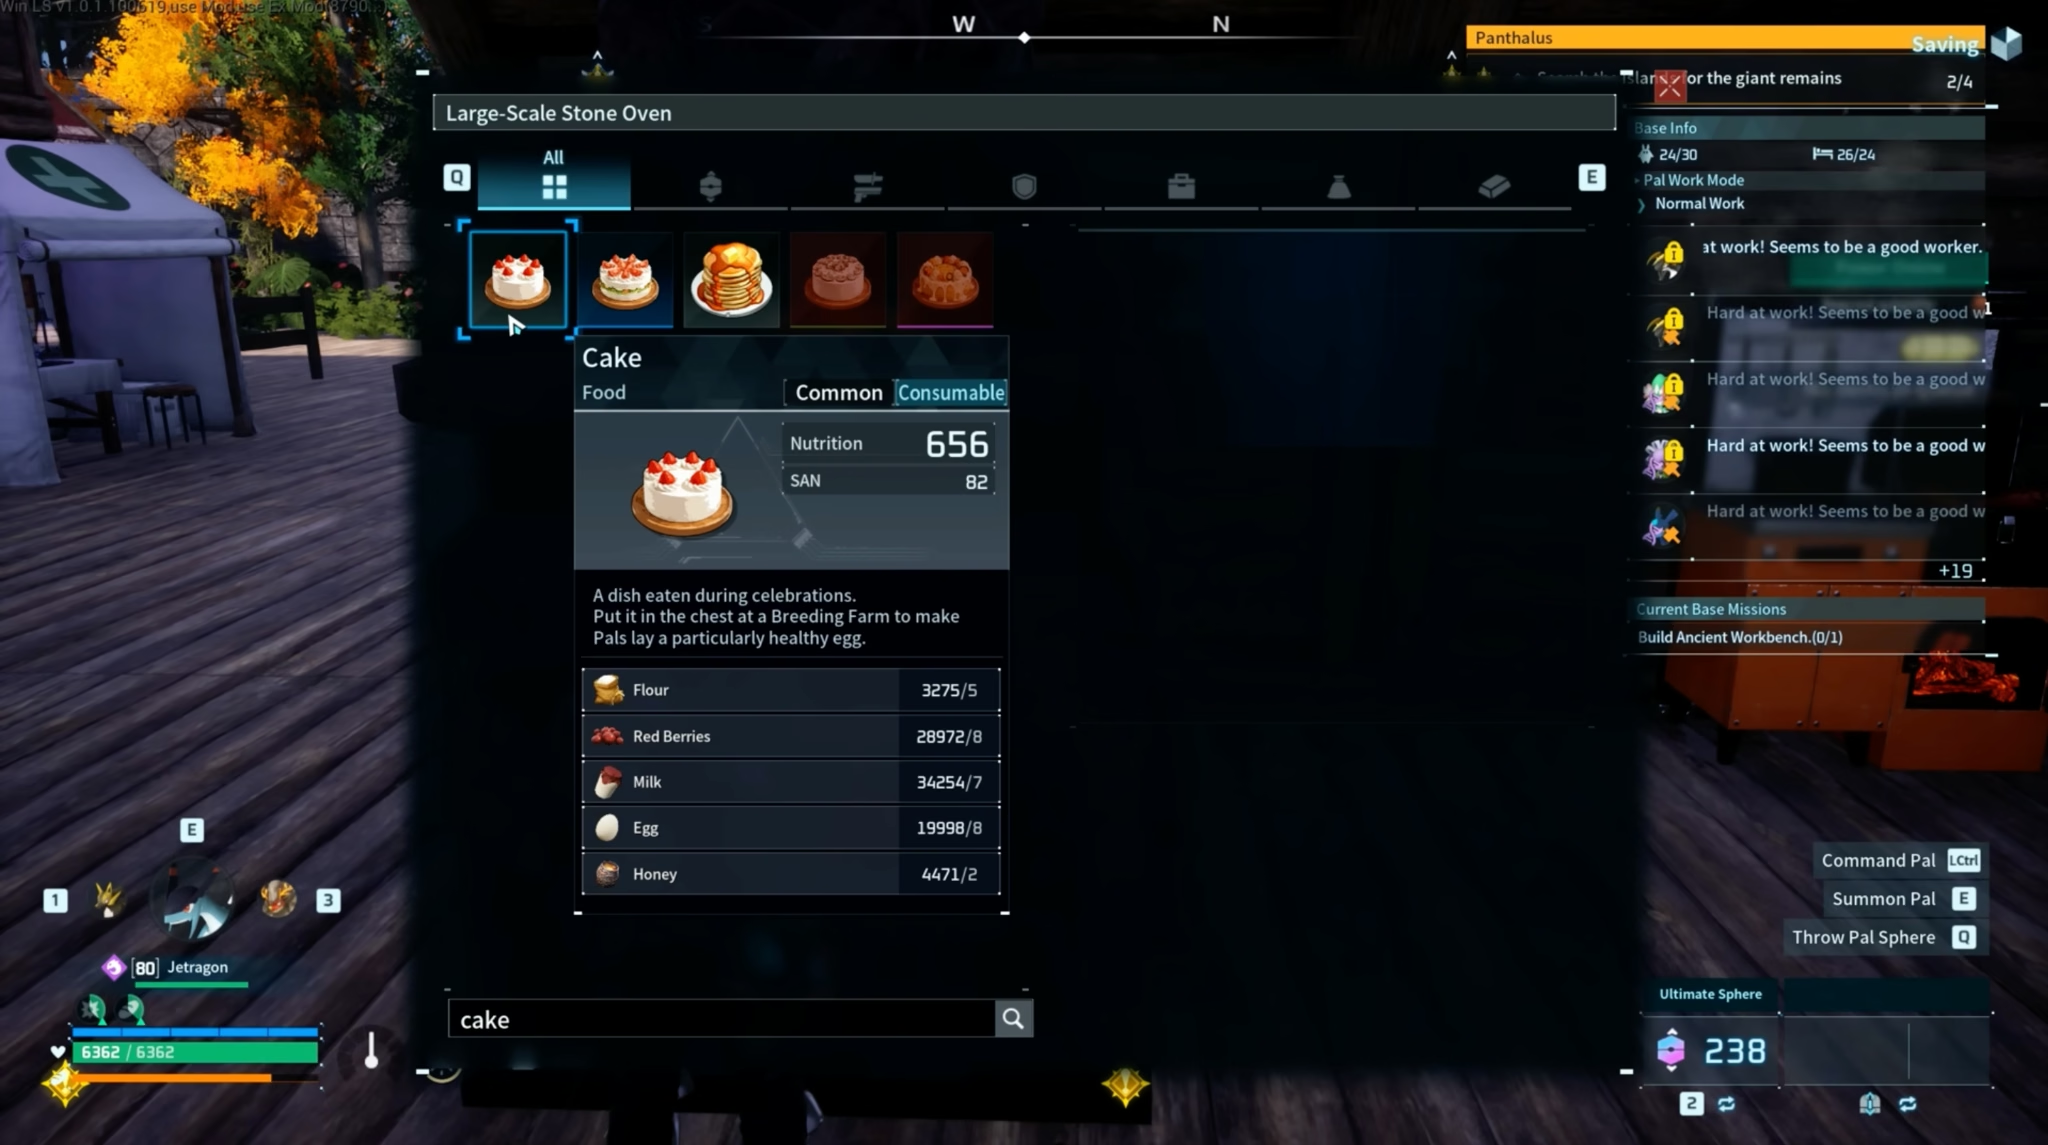
A useful breeding-production area should include:
- Required plantations
- Ranches for animal products
- A Mill for Flour
- A suitable cooking facility
- Ingredient storage
- Breeding Farms
- Space for completed eggs
Do not fill the entire base with Breeding Farms before confirming that your farming and cooking setup can supply enough Cake. Empty Breeding Farms provide no value.
Use our Palworld Breeding Calculator
Already know the parents you want to breed, or the Pal you want to hatch? Use our Palworld 1.0 Breeding Calculator to check the resulting child or find every valid parent combination.
Increase Ranch Capacity for Late-Game Materials
Ranch production was adjusted in Palworld 1.0, with improved output and more useful material options.
Late-game crafting can also increase demand for organs and products made from them, including Bio Batteries used by some advanced structures.
One Ranch may be enough early, but a production-heavy base may benefit from two or three depending on the materials you use most often.
Build additional Ranches only when the existing Ranch cannot meet demand. Every extra Ranch uses space and base Pal slots that could otherwise support farming, power generation or production.
You can also buy some materials from merchants, which may be more practical than dedicating an entire base to a resource you only need occasionally.
Recommended Palworld 1.0 Base Layout
There is no single layout that works for every location, but this structure keeps most jobs organised.
Centre
Place the Palbox, Feed Box and main storage in the central area.
This gives Pals shorter routes between common tasks and makes it easier for you to manage the base after fast travelling.
One Side: Farming and Breeding
Group plantations, the Mill, cooking facilities, Ranches and Breeding Farms together.
These systems share ingredients, so keeping them close reduces transporting time.
Opposite Side: Production
Place furnaces, assembly lines, workbenches, crushers and material-production structures together.
Keep input and output storage close to each facility.
Outer Area: Power
Large generators and high-energy machines need space. Place them away from narrow routes and leave room for additional power facilities.
Quiet Area: Pal Recovery
Group beds, Hot Springs, the Clinic and Monitoring Stand somewhere accessible but outside the busiest production paths.
Pals should be able to reach recovery facilities without crossing blocked or crowded work areas.
Efficient Base Checklist
Before considering the base complete, check that:
- Pals have wide routes between workstations and storage.
- Frequently used materials have nearby chests.
- There are enough Transporting Pals for the amount being produced.
- Food and SAN recovery match the workload.
- At least one Handiwork Pal can repair structures.
- High-energy facilities have enough electricity.
- Ranch and farming output can support your breeding projects.
- Empty workstations are removed or disabled.
- Decorative objects do not block Pal movement.
- There is space for future 1.0 facilities.
A strong base is not simply the one with the most machines. It is a base where Pals spend most of their time working, recovering or transporting over short distances instead of becoming stuck or walking across the entire base.