Gears of War: E-Day 100% Campaign Route – All Collectibles, Hard Cases, Supply Caches & Side Missions
Complete Gears of War: E-Day in one route with all 140 Collectibles, 125 Hard Cases, 36 Supply Cache stations and 17 Secondary Objectives, organized chapter-by-chapter with point-of-no-return warnings.
Gears of War: E-Day 100% Campaign Route – All Collectibles, Hard Cases, Supply Caches & Side Missions
If you want to finish Gears of War: E-Day without keeping four different location guides open, this is the route to use.
It combines the Campaign's four completion counters into a single chapter-by-chapter sweep:
| Completion category | Total | Main achievement |
|---|---|---|
| Standard Collectibles | 140 | Memories From E-Day |
| Hard Cases | 125 | Relax. I'm the Map. |
| Supply Cache stations | 36 | War Journal completion counter |
| Secondary Objectives | 17 | Side Piece |
That is 318 tracked locations/objectives across the Campaign.
If you are also going for For Whom The Bell Tolls, start the run on Insane. That achievement requires completing the Campaign on Insane while also completing the side missions and finding the hidden items. The individual collectible and side-mission achievements do not require Insane.
Supply Cache warning: the 36 Supply Cache stations tracked in the War Journal are not the same thing as the Quartermaster achievement. Quartermaster is tied to unlocking the eligible weapons, Tactical Gear and equipment that can be stored in the Campaign cache system. Open every cache station on this route, but also pick up/stow new equipment when you encounter it.
Current tracking issue: some players are still reporting War Journal totals that remain one short even when the detailed list appears complete, especially in Acts 2 and 4. Check your totals at the end of every Act so you know where a problem started.
The route below keeps the detailed location wording from our existing Collectible and Hard Case guides. In the large open chapters, clear each route phase completely before advancing the story; that is safer than trying to bounce between categories one item at a time.
Act 1 – 13 Collectibles, 0 Hard Cases, 0 Supply Caches, 0 Secondary Objectives

Act 1 is the cleanest section of the run: there are no Hard Cases, Supply Cache stations or Secondary Objectives yet, so you only need to stay on top of the standard collectibles.
Act 1, Chapter 1: Emergence
Chapter target: 3 Collectibles · 0 Hard Cases · 0 Supply Caches · 0 Secondary Objectives
Collectibles
| Collectible | Where / What to Do |
|---|---|
| Monster Jaw | After the first Wretch encounter and the short scene that follows, you regain control back on the street. Before moving deeper into the city, look down beside the newspaper kiosk/newsstand on the right-hand side. The Monster Jaw is on the ground there. |
| Bloody Transit Worker's Helmet | Continue through the maintenance tunnels until you pass the first Emergence Hole and reach the next corridor. Watch the left-hand side for a small side room/opening with a fallen transit worker and a flashlight. Enter the room and search beside the body for the helmet before continuing through the tunnel. |
| Front Page of the Kalona Times | After Marcus helps the civilians trapped beneath the rubble, return to the street and enter the Café & Bakery instead of following the objective straight on. Go through the door beside/behind the counter into the back kitchen and search the counter area for the newspaper. |
Before leaving: 3/3 Collectibles for this chapter.
Act 1, Chapter 2: Survival of the Fittest
Chapter target: 4 Collectibles · 0 Hard Cases · 0 Supply Caches · 0 Secondary Objectives
Collectibles
| Collectible | Where / What to Do |
|---|---|
| KPD Police Bulletin | Once you enter the Kalona Police Department, stop in the first large office/bullpen rather than pushing deeper into the station. Search the left side of the room, toward the back-left desks/tables, for the Police Bulletin. |
| Bloodied Police Chief's Badge | Progress through the police station and the shooting-range section until you reach the room containing the Police Chief impaled against the wall by a large metal spike. Before leaving the room, search beside the Chief's body and around his feet for the bloodied badge. |
| Army Recruitment Pamphlet | Inside the COG Armed Forces Recruitment Center, go to the reception area and walk behind the desk positioned against the back wall beneath the COG plaques. The pamphlet is sitting behind the reception desk, so collect it before leaving the lobby. |
| Try On Pilot Helmet | Stay inside the same recruitment-center lobby after collecting the Army Recruitment Pamphlet. Look to the right of the reception desk at the row of display helmets and interact with the pilot helmet there. Grab both recruitment-center collectibles before moving on. |
Before leaving: 4/4 Collectibles for this chapter.
Act 1, Chapter 3: A Gear in Need
Chapter target: 2 Collectibles · 0 Hard Cases · 0 Supply Caches · 0 Secondary Objectives
Collectibles
| Collectible | Where / What to Do |
|---|---|
| Tomatoes, Canned | Enter the Pay-n-Save warehouse/supermarket back area while following the route toward the Gear who needs help. Move through the first room and into the second warehouse room, then veer left of the central storage shelves. The canned tomatoes are in a cardboard tray on the floor near a body. |
| Broken Lancer Bayonet | Continue through the supermarket until the scene involving Tai and the chainsaw finishes. When you regain control, do not leave the supermarket immediately. Inspect the dead Locust/body close to Marcus — near the produce/store-sign area — and collect the broken Lancer bayonet from the body. |
Before leaving: 2/2 Collectibles for this chapter.
Act 1, Chapter 4: Back in the Fold
Chapter target: 4 Collectibles · 0 Hard Cases · 0 Supply Caches · 0 Secondary Objectives
Collectibles
| Collectible | Where / What to Do |
|---|---|
| Front Page of the Tyran Chronicle | At the beginning of the chapter, follow the road until you reach the large Bar & Lounge / white 'Lounge' sign. Before continuing with the squad, check the right-hand alcove/alley beside the sign and search the doorstep/end of that short side route for the newspaper. |
| Anti-UIR Propaganda Poster | As you approach the clinic, do not head straight inside. Go down the nearby steps and take the route to the right, following the side of the street toward the graffiti-covered wall. The propaganda poster is fixed over the graffiti; check the wall before turning back toward the clinic. |
| Landa Memorial Medical Supplies Memo | Enter Landa Memorial and search the reception/office area before opening the doors that take you back outside. The memo is on one of the tables/desks on the right-hand side of the room near the exit route. |
| COG Tags of Private Brick Rosso | After fighting your way out of the clinic, follow the route toward Echo Park. Just before the park entrance, stop at the blue police car on the left. Walk around the vehicle and search beside the fallen COG soldier for Brick Rosso's tags before entering the park. |
Before leaving: 4/4 Collectibles for this chapter.
Act 1 War Journal check
Before moving on, confirm Act 1: 13/13 Collectibles.
Act 2 – 38 Collectibles, 36 Hard Cases, 11 Supply Caches, 7 Secondary Objectives
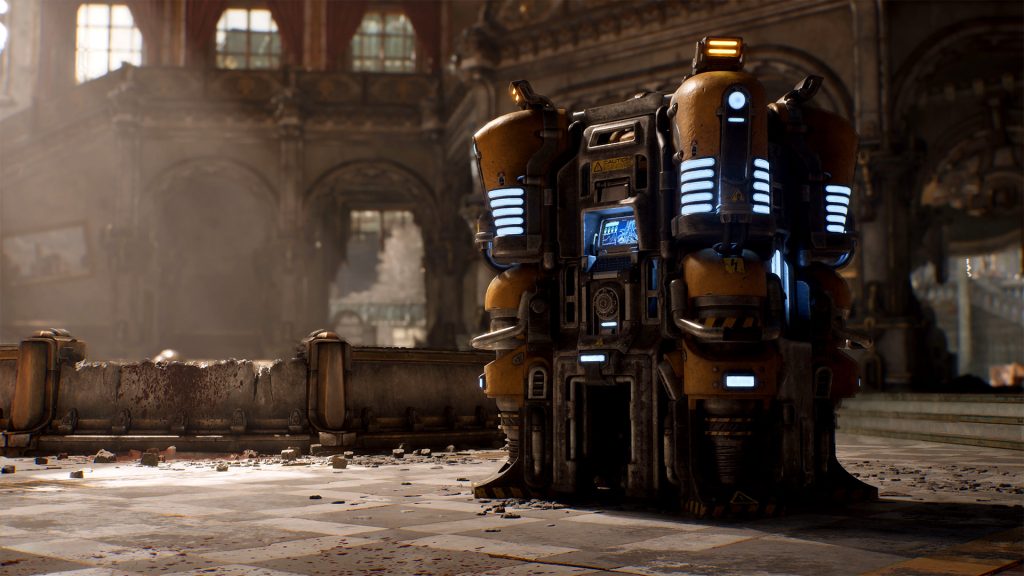
Act 2 is where the full completion route begins. Hold the Line is the most important chapter in the Act and should be treated as three separate sweeps.
Act 2, Chapter 1: Bravo Squad
Chapter target: 5 Collectibles · 0 Hard Cases · 0 Supply Caches · 0 Secondary Objectives
Collectibles
| Collectible | Where / What to Do |
|---|---|
| COG Helmet With Bullet Hole | After getting outside, follow the newly opened route until you reach the bus. Before continuing forward, move around the back of the bus and search the ground for the helmet. |
| Sniper Goggles | Enter the first bridge control room. Before interacting with the controls, take the short corridor on the left and search the end of it for the goggles. |
| Bridge Worker's Lunch Kit | After helping Charlie Squad, move below the bridge instead of immediately continuing with the objective. Keep to the left side and search the work area for the lunch kit. |
| Trashball RUSH Magazine | Inside the second bridge control room, search the right-hand side of the room before using the controls or leaving the area. |
| Medic's First Aid Kit | After the final bridge fight, search the rear of the combat area near the fallen Gear before moving on to the next section. |
Before leaving: 5/5 Collectibles for this chapter.
Act 2, Chapter 2: Hold the Line
Chapter target: 27 Collectibles · 27 Hard Cases · 9 Supply Caches · 7 Secondary Objectives
Major warning: Hold the Line changes its accessible map several times. Treat Parts 1, 2 and 3 as one-way sweeps. Complete Family Reunion before linking with Charlie Squad, and finish Black Raven Down and Lone Wolf before committing to the Kalona Hotel/end-of-chapter route.
Follow the three phases below in order. Do not move into the next phase until every table in the current phase is clear.
Part 1 – North Kalona / opening area
Clear this opening area completely before the route expands. The Vanguard and Trapped Family are both here.
Secondary Objectives
| Objective | Where / What to Do |
|---|---|
| The Vanguard | At the car dealership/gas-station opening area after the map pickup and the truck moves. Speak to the COG soldier, accept the objective, destroy the E-Hole and kill every attacker. Finish it before leaving the opening Hold the Line area. |
| Trapped Family | At the Last Dollar parking area, clear the attackers, raise the right-hand shutter, go behind the counter and press the button beside the register to rescue the family. Complete it before leaving the first open section. |
Collectibles
| Collectible | Where / What to Do |
|---|---|
| Cinema Filmatica Magazine | Near the beginning of the open section, enter the car dealership garage and search inside before moving deeper into the district. |
| A Letter Home | Complete or enter the building used during the trapped-family side objective. Search inside the building for the letter before leaving. |
| Trashies Cereal Box | Enter the fuel-station store and check the counter area for the cereal box. |
Hard Cases
| Hard Case | Where / What to Do |
|---|---|
| Burnt Bus Junction | While exploring around the Trapped Family area, leave the car park by the route the enemies used and turn onto the main road. At the nearby junction, take the right-hand dead-end branch and go behind the burnt-out bus. The Hard Case is tucked behind it with an enemy nearby. |
Supply Caches
| Supply Cache | Where / What to Do |
|---|---|
| COG staging area — Part 1 | At the start of Hold the Line after receiving your orders. Open the tutorial Supply Cache before leaving the staging area. |
| Octus Way Station — Part 1 | At the end of the subway/way-station route, on the right near the large metal doors. Open it before the chapter expands into the next district. |
Part 2 – Central / East Kalona
This is the biggest sweep in the chapter. Finish Apartment SOS, Lost in Translation and Family Reunion before linking with Charlie Squad.
Secondary Objectives
| Objective | Where / What to Do |
|---|---|
| Apartment SOS | Once Part 2 opens, use the apartments with the HELP banner. Reach the survivors, breach the route out and clear the Locust from the stairway until the survivors make it down safely. |
| Lost in Translation | After Amberstone Storage Facility, while the main objective is Find Mags' Meds, return to the Major Burger near the police station. Speak to the two civilians and escort both to the shelter through every ambush. |
| Family Reunion | After Mags' apartment, go to Shelter 13 before linking up with Charlie Squad. Accept the defense, clear the Locust and remain until the concluding dialogue/completion notification. |
Collectibles
| Collectible | Where / What to Do |
|---|---|
| Kalona Postcard | Leave the fuel station and take the alley on the right. Search along the alley before returning to the main street. |
| Vandalized Salvaging Poster | Enter the Major Burger near the opening area and search the interior walls for the poster. |
| Foreman's Datapad | At the construction site, stay on the ground floor and search the work area before climbing or moving on. |
| COG Tags of Private Liz Waxman | Search the scaffolding on the east side of the area. The tags are found on the body positioned along the scaffold route. |
| Emgazi Blitz Display Case | Enter the nearby apartment building and search the interior for the display case. |
| Birthday Card with Toy Lancer | Go beneath the bridge west of the bank. Look for the body facing the river and search beside it for the card and toy Lancer. |
| Kalona Metro Fare Notice | Find the subway entrance south of the bank and inspect the entrance area for the fare notice. |
| Tales from the Tyran Night Story Book | Search the scaffolded building near the bank. The book is inside rather than out on the street. |
| Major Burger Box | Enter the restaurant near the missing-squad objective and go into the back room. The box is inside. |
| COG Tags of Specialist Brendan O'Connell | From the missing-squad objective area, move northeast into the alley and search for the fallen Gear. |
| COG Tags of Master Sergeant Mark Avalon | Head toward the loading-bay area west of the warehouse district and search inside for Avalon's tags. |
| Caricature of Colonel Elias Trench | Near the end of the bridge, check the nearby pole rather than moving straight on. The caricature is attached to it. |
| COG Tags of Specialist Arnold Imhatip | After collecting the Trench caricature, move under the bridge and search the nearby area for the body and tags. |
| Timgad Refinery Recruitment Poster | Enter the building west of the warehouse district and search the interior walls for the recruitment poster. |
| Re: Vibration Complaints | Around the Imulsion Stockpile objective, enter the nearby building and search inside for the document. |
| Photograph and Harmonica from Mags' Apartment | Progress the story until you enter Mags' apartment. The photograph and harmonica are received after the story scene there. |
| War Savings Bond | When the story allows access to the Bank of Tyrus vault, search inside the vault for the bond before leaving. |
| COG Tags of Specialist Jada Clemmons | Enter the restaurant near the bank and search inside for the fallen Gear and tags. |
Hard Cases
| Hard Case | Where / What to Do |
|---|---|
| Construction Site – Upper Floor | Go to the construction site near the beginning of Part 2. The standard collectible is on the ground floor, but the Hard Case is one level above. Use the site stairs/scaffolding and search the upper floor. |
| Major Burger Car Park – Top Floor | From the opening area, locate the multi-level car park beside the Major Burger. Climb to the top level and search the open parking area for the case. |
| Canal Path Below the Bridge | Near the bridge, do not cross immediately. Turn left and take the stairs down toward the water/canal path. Follow the lower route to its end to find the case. |
| Yard South of Amberstone | Head toward the southern side of the Amberstone Storage Facility and enter the open yard below it on the map. Sweep the yard rather than staying on the street; the case is inside this lower area. |
| Southern District Alley | Continue through the lower/southern portion of the district and check the dead-end alleys. One of the Hard Case markers leads into an alley near the bottom of the map. |
| COG Roadblock Window Room | Face the COG roadblock and take the alley on the right. Use the climbable ladders to reach the next level, break/shoot the window and climb into the room. The Hard Case is inside. |
| Kalona Times – Upper Floor | Find the Kalona Times building and go upstairs. Search the upper floor rather than remaining at street level. |
| Newspaper Kiosk | From the Kalona Times area, look across the street for the small kiosk/newsstand. The Hard Case is out on the street beside it and is much easier to spot once you know to look away from the building. |
| Crashed Truck Ambush | Around the bank/river side of the district, investigate the crashed truck instead of passing it. Expect enemies around the wreck; clear them and search the crash site for the case. |
| Eastern Construction Route | Go to the far/eastern side of the construction area, climb the steps and reach the main road. Once on the road, look left for the Hard Case. |
| Pharmacy Across the Road | From the previous case, cross the main road and move to the right-hand side near the pharmacy. The next case is outside/along the pharmacy frontage. |
| Upper Room Opposite Construction Site | Across from the construction site, find the building with a shipping container that can be used as a step. Climb the container, enter the upper room and open the case inside. |
| Muster Point Loading-Dock Alley | Near the objective to investigate the muster point, search the nearby loading-dock area. Take the side alley rather than entering the objective building immediately. |
| Muster Point Building – Right Side | At the muster-point building itself, search the right-hand side behind the pillars before progressing the objective. |
| Amberstone Storage Facility | The story eventually sends you into Amberstone. Follow the required route inside, but watch the Hard Case marker and search along the path to the objective before moving deeper into the facility. |
| Riverside Underground Car Park | Return toward the river and enter the underground parking structure on the opposite side from the earlier riverside collectible route. Search the lower car-park section for the case. |
| Bank of Tyrus Vault | When the story finally opens the Bank of Tyrus vault, enter it and look right. The lore collectible is on the other side, while the Hard Case is on the right. Grab both before leaving the vault. |
| Charlie Squad Camp | When the objective changes to Link up with Charlie Squad and the previously closed route opens, enter the camp and check the right-hand side. The Hard Case is sitting on a table. |
Supply Caches
| Supply Cache | Where / What to Do |
|---|---|
| Canal-side garage — Part 2 | After entering the larger district, use the canal steps and check the garage opposite the entrance. |
| Theater — Part 2 | Inside the theater, beneath the Cold Snap poster. Visit it while clearing the central district. |
| Major Burger by the loading dock — Part 2 | Inside the Major Burger beside the loading-dock area. Do this before leaving the central district. |
| Police Department — Part 2 | Inside the Police Department, below the emblem. This is a useful stop while working around the police-station side of the district. |
Part 3 – West Kalona / library and hotel
Finish Black Raven Down and Lone Wolf, then clear the hotel-side Hard Cases and collectibles before taking the final route out.
Secondary Objectives
| Objective | Where / What to Do |
|---|---|
| Black Raven Down | During the final Hold the Line stage, visit the Major Burger beneath the overhead rail near the Kalona Hotel. Speak to the wounded Gear and defeat the attackers before committing to the hotel route. |
| Lone Wolf | After completing the nearby courtyard main objective, return to the library-side apartments. Use the now-active elevator, reach the isolated COG sniper and clear the Locust. This route also gives access to Elijah Adams' COG Tags. |
Collectibles
| Collectible | Where / What to Do |
|---|---|
| Pendulum Wars Victory Flag | Around the hotel area, check the nearby newsstand for the flag. |
| Child's Monster Drawings | On the route toward the hotel, enter the store and search the back room rather than staying on the main path. |
| Holiday Photos | Around the shelter area, after helping the injured Gear from the crashed Raven, search the nearby area for the photos. |
| Muster Point Instructions | Continue toward the hotel and inspect the courtyard area along the route for the instructions. |
| COG Tags of Sergeant Elijah Adams | Complete the side mission involving the COG sniper. The tags are found during that optional objective, so do not skip it if you want all 27 collectibles. |
| Portrait of Chairman Tomas Dalyell | Enter the hotel through the main entrance, go right, then head upstairs and search the upper area for the portrait. |
Hard Cases
| Hard Case | Where / What to Do |
|---|---|
| Military Camp Shipping Container | As you walk through the military camp at the start of the stage, check the open shipping containers instead of following the squad straight through. The case is inside one of them. |
| Park Opposite Monroe Library | Face the large Monroe Library building and look for the park across from it. Enter through the gate and go to the back-left corner of the park. |
| Kalona Hotel Entrance | At the front entrance to the Kalona Hotel, check the right-hand side before going inside or continuing around the building. |
| Balcony Opposite the Hotel | Across from the hotel is a building with a pale-green upper balcony. Use the rope to reach the next floor; the Hard Case is immediately to your left after climbing up. |
| Whiskey Squad Search-Zone Alley | Use the central steps that lead into the Whiskey Squad search area. Cross over, descend, then turn right into the side alley. Follow it to the case and open the nearby shortcut gate while you are there. |
| Behind the Police Car | Return to the street from the previous alley and continue forward through the search zone. Look behind the police car for the next case. |
| Fountain Courtyard | When you reach the courtyard with the bloodied fountain, turn left and search the side of the courtyard before crossing to the objective. |
| After Leaving Kalona Hotel | After the story takes you through the hotel and you drop back to street level, stop before heading into the park/end-of-chapter route. Look right, beside the car, for the final Hold the Line Hard Case. |
Supply Caches
| Supply Cache | Where / What to Do |
|---|---|
| Octus Tribunal Muster Point — Part 3 | After the courthouse/muster-point cutscene, drop down and look left immediately. |
| Under the train line — Part 3 | Take the steps down beneath the elevated train line and open the cache beside the lower street/truck route. |
| Kalona Hotel lobby — Part 3 | Inside the Kalona Hotel, go downstairs in the lobby/reception area before advancing the hotel route. |
Before leaving: 27/27 Collectibles for this chapter · 27 Hard Cases from this chapter · 9 Supply Cache stations · 7 Secondary Objectives.
Act 2, Chapter 3: No Gear Left Behind
Chapter target: 5 Collectibles · 6 Hard Cases · 1 Supply Caches · 0 Secondary Objectives
Collectibles
| Collectible | Where / What to Do |
|---|---|
| COG Tags of Private Sal Harkniss | After the major cutscene, continue into the tunnel and search beside the first fallen Gear for the tags. |
| COG Tags of Private Siv Strickland | Stay in the same tunnel section and continue until you reach the second fallen Gear. Search the body for Strickland's tags. |
| Bloodied Spike | Before reaching the giant golden Gear statue, keep to the right-hand side of the road and search the dead soldier tucked into the corner. |
| Ink-Covered Wrench | In the plaza containing the giant golden Gear statue, search the ground on the left side for the wrench. |
| COG Tags of Lieutenant Jane Hawkins | After speaking with Captain Gray and leaving the building, go down the steps and check the right-hand side before passing through the gate. |
Hard Cases
| Hard Case | Where / What to Do |
|---|---|
| Crashed-Vehicle Tunnel | Near the beginning of the chapter, enter the tunnel filled with wrecked vehicles. Move forward and watch the central barricade; the Hard Case sits near the middle of the tunnel. |
| Tunnel Exit Incline | After the section with the two COG Tag collectibles, leave the tunnel and head up the incline. Check the right-hand side while climbing. |
| Golden Gear Statue Plaza – Right Side | Reach the plaza with the giant golden Gear statue and clear the Locust. Face the statue and move to the right-hand corner of the plaza. |
| Statue Plaza Scaffolding | From the center of the same plaza, take the stairs up the scaffolding on the right. Follow the elevated route to the shipping container containing the case. |
| Below the Scaffolding Route | From the previous case, return toward the middle of the scaffolding and drop down toward the main objective. Continue forward and check the right side for another case. |
| Building After the Seeder Fight | After the Seeder encounter, follow Captain Grey through the building. About halfway through the interior route, stop and look left for the final case before leaving the building. |
Supply Caches
| Supply Cache | Where / What to Do |
|---|---|
| Scaffolding route after the golden-statue plaza | On the elevated scaffolding/shipping-container route after the giant golden Gear statue plaza. Open it before dropping back to the main path. |
Before leaving: 5/5 Collectibles for this chapter · 6 Hard Cases from this chapter · 1 Supply Cache station.
Act 2, Chapter 4: Fly Boys
Chapter target: 0 Collectibles · 0 Hard Cases · 0 Supply Caches · 0 Secondary Objectives
There are no items from the four 100% completion categories in this chapter. Play through normally and continue to the next chapter.
Before leaving: no completion-category cleanup required.
Act 2, Chapter 5: Overrun
Chapter target: 1 Collectibles · 3 Hard Cases · 1 Supply Caches · 0 Secondary Objectives
Point of no return: the final hangar closes Act 2. Collect the Data Pad, final Hard Case and Supply Cache before pushing the last objective.
Collectibles
| Collectible | Where / What to Do |
|---|---|
| Point Fairlight Hangar Data Pad | Once inside the hangar, search the left-hand side before pushing into the next objective. Pick up the datapad before leaving the hangar section. |
Hard Cases
| Hard Case | Where / What to Do |
|---|---|
| Warehouse Breach | After the warehouse fight, an explosion opens a hole in the wall opposite the way you entered. Before climbing through the new opening, look to the right of the hole for the Hard Case. |
| Red-Glow Crater | After the next outdoor fight, the route takes you down into the crater filled with red light. As you reach the bottom and enter the crater, the case is directly along the route. |
| Final Hangar Supply Cache | Back in the hangar where the group is preparing for the attack, locate the Supply Cache. The final Hard Case is immediately nearby, so open it before advancing the chapter. |
Supply Caches
| Supply Cache | Where / What to Do |
|---|---|
| Final hangar | Inside the final hangar on the left, beside the Point Fairlight Hangar Data Pad and the nearby final Hard Case. |
Before leaving: 1/1 Collectibles for this chapter · 3 Hard Cases from this chapter · 1 Supply Cache station.
Act 2 War Journal check
Before moving on, confirm Act 2: 38/38 Collectibles, 36/36 Hard Cases, 11/11 Supply Caches, 7/7 Secondary Objectives.
Act 3 – 36 Collectibles, 38 Hard Cases, 8 Supply Caches, 3 Secondary Objectives

Act 3 mixes linear chapters with the large Last Foothold district. Check the War Journal before leaving Last Foothold because all three Act 3 Secondary Objectives are there.
Act 3, Chapter 1: Stranded
Chapter target: 5 Collectibles · 3 Hard Cases · 2 Supply Caches · 0 Secondary Objectives
Point of no return: grab the COG Army Knife before dropping to the lower route; you cannot simply climb back.
Collectibles
| Collectible | Where / What to Do |
|---|---|
| COG Army Knife | After reaching the first badly mauled body beyond the small campsite, do not immediately follow the story route downhill. Continue into the trees and search around the base of the nearby trees for the knife. Grab it before dropping to the lower route because you cannot simply climb back up. |
| Fairlight Rifle Range Sign | After vaulting the tall fence into the military vehicle/training area, sweep the perimeter beside the tank and inner fencing. The rifle-range warning sign is mounted along the edge of the compound rather than on the main path. |
| Gut-Puncher Grenade Rounds | Inside the Fairlight vehicle/airfield area, locate the first Supply Cache. The collectible is beside the cache, so check the ground and nearby equipment before moving on. |
| UIR Soldier Shooting Target | When you reach the substation used to restore power/light for the helipad, do not enter the building immediately. Follow the outside edge toward the fence and look for the broken shooting target leaning against machinery. |
| Prepper's Scavenging Map | In the same substation area, search between the large generator/electrical units near the entrance side of the compound. The map is tucked low between two pieces of equipment and is easy to walk past. |
Hard Cases
| Hard Case | Where / What to Do |
|---|---|
| Crashed Raven / Vehicle Area | Continue toward Fairlight until you reach the area filled with wrecked helicopters and military vehicles. Sweep the left side around the crashed Raven/vehicle area before heading toward the base. |
| Fairlight Shipping Containers | After vaulting the fence into Fairlight, turn left instead of heading directly through the compound. Search beside the red/orange shipping containers for the case. |
| Substation – Left Side | When you reach the substation, enter the compound and immediately work around the left-hand side. The final Stranded case is tucked into the left portion of the station area. |
Supply Caches
| Supply Cache | Where / What to Do |
|---|---|
| Fairlight warehouse | Inside the large warehouse in the Fairlight compound, beside the Gut-Puncher Grenade Rounds collectible. |
| Substation | Inside the substation; turn left after entering and open the cache before moving deeper into the objective. |
Before leaving: 5/5 Collectibles for this chapter · 3 Hard Cases from this chapter · 2 Supply Cache stations.
Act 3, Chapter 2: Enemy Lines
Chapter target: 6 Collectibles · 8 Hard Cases · 2 Supply Caches · 0 Secondary Objectives
Collectibles
| Collectible | Where / What to Do |
|---|---|
| Damaged Gnasher Shotgun | Early in the underground section, before pushing deeper into the next red-lit area, check the side tunnel off the main route. The damaged Gnasher rests on blue military cases/crates. |
| Parchment and Powder Pouch | At the first proper Locust camp underground, inspect the supplies on the left side instead of walking straight through. The parchment and pouch are mixed in with the Locust equipment and weapons. |
| Parchment with Indecipherable Writing | After clearing the old subway station, move toward the far side of the room but stop before taking the stairs toward the objective. Search the back-right wall / area below the stairs for the parchment. |
| COG Tags of Private Beth Avila | When Marcus comments about climbing around the trains, look toward the destroyed train beside the red-lit section. Circle the wreck and continue into the darker area behind it to find the body and tags. |
| Maintenance Worker's Bloodied Flashlight | From Beth Avila's tags, head the opposite direction through the intact station and follow the other set of tracks into the red-lit wrong-way tunnel. Marcus comments about the bad air/wrong direction. Continue a little farther and check the ground for the flashlight. |
| COG Tags of Private First Class Erick Davis | After seeing the huge Locust force in the tunnels, you eventually reach the enormous sewer/stormwater basin. Circle the basin and look for a corpse beside a Supply Cache to collect the tags. |
Hard Cases
| Hard Case | Where / What to Do |
|---|---|
| Beyond the Damaged Gnasher Room | Shortly after the area containing the Damaged Gnasher collectible, continue toward the next red-lit section. Before passing the second red light, search the right-hand side for the case. |
| Abandoned Subway Station – Left Side | At the first abandoned subway station where enemies appear, stay on the left side of the station and search the platform area. |
| Beside the Station Supply Cache | In the same station, face the Supply Cache and look to the right behind the pile of wood/planks. The case is partially hidden behind the obstruction. |
| Eastbound to Terminus Platform | After the Screamer fight, climb across the train cars and head left toward the Eastbound to Terminus Station platform. Search the platform before returning to the story route. |
| Beyond the Train Crossing | Continue through the rail section and cross the next train route. Once you are beyond the crossing, check the right-hand side before following the objective onward. |
| Courthouse / Fallen Statue Route | In the courthouse area around the large hand/statue landmark, search the lower route on the left. One of the cases sits off the direct path around this section. |
| Second Courthouse Case | Continue through the same courthouse area. After the route bends right, sweep the left edge/cliff side rather than walking straight to the next objective. |
| Sewer Supply Cache | After the cinematic showing the huge Locust force, enter the sewer section. The final case is beside the Supply Cache, close to the COG Tags of Private First Class Erick Davis. |
Supply Caches
| Supply Cache | Where / What to Do |
|---|---|
| Upper subway station | On the upper floor of the abandoned subway station, near the central Hard Cases. Open it before leaving the station. |
| Sewer pit room | In the sewer basin/pit room late in the chapter, beside the final Hard Case and the COG Tags of Private First Class Erick Davis. |
Before leaving: 6/6 Collectibles for this chapter · 8 Hard Cases from this chapter · 2 Supply Cache stations.
Act 3, Chapter 3: Last Foothold
Chapter target: 14 Collectibles · 12 Hard Cases · 2 Supply Caches · 3 Secondary Objectives
Open-district warning: complete Weak Signal, Lost in the Park and Rooftop Mayday before following the chapter-ending route out of the hotel/hospital district.
Recommended sweep: opening Emergence Hole and COG positions → Monroe Library → police/loading-bay side → hospital → hotel/park → return for Rooftop Mayday before leaving the district.
Secondary Objectives
| Objective | Where / What to Do |
|---|---|
| Weak Signal | Enter the loading bay across from the Police Department once the hospital/police side opens. Trigger the task from the rear-right area and defeat every incoming Locust before leaving the district. |
| Lost in the Park | After the convoy-loading story section and the Spore Matron encounter, enter the park beside the Kalona Hotel, clear the Locust and rescue the civilian below the steps. The Damaged Heavy Locust Helmet is also on this route. |
| Rooftop Mayday | Late in the chapter, return to the hospital side and use the red-tarpaulin gate southeast of Landa Memorial. Climb to the rooftop, defeat the enemies including the Reaver and finish the rescue. The Blade-like Projectiles collectible is on the route up. |
Collectibles
| Collectible | Where / What to Do |
|---|---|
| COG Tags of Sergeant First Class Robin Hamill | As soon as you return to the city, locate the large glowing Emergence Hole. The body with the tags is close to the hole, before the area fully opens up. |
| COG Tags of Corporal Tracy Moore | After moving through the transit/rail section, keep left and climb into the broken-open apartment building. Search the rear room of the exposed apartment for the tags. |
| Colonel Trench's VIP List | At the small COG outpost, search the tents rather than immediately leaving with the squad. The VIP list is on a desk in the camp area. |
| COG Tags of Private Luis Garcia | When moving out with the next COG group, you reach a red-lit area before another firefight. Circle the rock, move uphill and keep right toward the worn military tent. The tags are on the ground there. |
| Captain Grey's Field Journal | At the later COG camp/field hospital where the squad reconnects with leadership, inspect the tables near the computers. The open field journal is sitting on one of the desks. |
| Landa Memorial Hospital Evacuation Order | Clear the hospital/ER area and return to the entrance/front-desk zone. Check the reception/whiteboard area for the evacuation document. |
| COG Tags of Specialist Rachel Carnahan | Inside Landa Memorial Hospital, go to the upper floor of the emergency wing. Look for the body near the snack/vending-machine area by a doorway. |
| COG Tags of Private Terrance Sander | During the civilian-defense section around the loading-bay/police-building area, search the building rather than leaving immediately after the fighting. The tags are on a fallen Gear inside/near the entrance area. |
| COG Tags of Private Oded Bay | Return to the bloody fountain previously used by the Locust as a gruesome message. Search the fountain itself for the tags. |
| Locust Pistol Ammunition | Follow the riverside route toward the hotel area and inspect the bodies along the water. The ammunition collectible lies with a dead Locust. |
| COG Tags of Specialist Bernard Havelock | Find the damaged transit/monorail car. Use the nearby vehicle/hood to climb into the wrecked carriage, then search the body inside for the tags. |
| COG Tags of Private First Class John Carnahan | Around the southeastern shelter/hotel section, check the outside wall of the building instead of only following the street. The body is slumped against the wall near the route to the final objective. |
| Damaged Heavy Locust Helmet | Start the Secondary Objective that opens the park while searching for the missing person/friend. Clear the enemies, then move through the western side/gate of the park and inspect the dead heavy Locust/Boomer for the helmet. |
| Blade-like Projectiles | After defeating the new flying enemy during the main route, start the later Secondary Objective near the hospital. Open the blocked gate and climb the stairs; the projectiles are on a body on the intermediate level before reaching the side-mission objective itself. |
Hard Cases
| Hard Case | Where / What to Do |
|---|---|
| Pool Hall Near Kalona Theater | At the start of the open city section, face the Kalona Theater and work around the subway side toward the nearby Pool Hall. The case is outside the Pool Hall, northeast of Victory Plaza. |
| Skytrain Building Exit | After moving through the damaged building opposite/near the theater, exit back toward the skytrain structure and immediately check left, overlooking the chasm. |
| Beyond the Bus / COG Truck | After regrouping with Tai and moving past the bus, continue to the first street light. Look right near the COG truck / wall for the case before moving deeper into the district. |
| Monroe Library Briefing Area | Enter Monroe Library and complete the briefing section. Before leaving the library route, search the rear-left area near the Supply Cache for the case. |
| South of Monroe Library / Hospital Approach | On the route toward Landa Memorial Hospital, search the building/roof approach south of the library instead of staying on the main road. |
| Landa Station / Hospital Road | Between Monroe Library and Landa Memorial Hospital, investigate Landa Station and the road opposite the nearby Supply Cache. The case is in this transition area. |
| Monroe Library Underground Parking | Return to the library side and locate the underground parking structure beneath/behind the library. Search the rear-left portion of the parking area. |
| Police Crossroads / Skytrain Platform | Around the police-station crossroads, get onto the raised skytrain/walkway section. The case is on the elevated route rather than at street level. |
| Library Supermarket Back Room | Enter the supermarket near Monroe Library and go into the back room. Search the interior fully before returning to the street. |
| Kalona Coast Pharmacy | North of the Kalona Hotel, enter the Kalona Coast Pharmacy through the broken/open window. The case is inside the pharmacy. |
| Under the Friendly Roadblock | Continue through the hotel district and inspect the route beneath the friendly COG roadblock / bridge structure instead of staying on the upper street. |
| Kalona Hotel / Hospital-Side Final Sweep | During the later route around the hotel and hospital, use Tac-Com before leaving the district and search the final hotel/hospital-side elevated route. Confirm 12/12 before committing to the chapter exit. |
Supply Caches
| Supply Cache | Where / What to Do |
|---|---|
| Monroe Library briefing room | On the left side of the library HQ briefing room. Open it before leaving the library section. |
| Hospital road | On the road approaching Landa Memorial Hospital, before entering the hospital-side route. |
Before leaving: 14/14 Collectibles for this chapter · 12 Hard Cases from this chapter · 2 Supply Cache stations · 3 Secondary Objectives.
Act 3, Chapter 4: The Convoy
Chapter target: 3 Collectibles · 5 Hard Cases · 1 Supply Caches · 0 Secondary Objectives
Point of no return: take the Hard Case beside the left barricade before dropping to the lower bridge deck.
Collectibles
| Collectible | Where / What to Do |
|---|---|
| COG Tags of Private Rudy Bartholomew | After the first combat encounter, move into the left lane and backtrack slightly instead of staying with the convoy. Look for the body beside a burning vehicle. |
| Locust Crest | After the first major bridge fight and after lowering the bridge, search beside the crashed police vehicle near the Locust body before rejoining the convoy. |
| COG Tags of Corporal Kevin Garbor | Inside the bridge control room used to lower the barrier, check the center of the room/floor before leaving. The tags are very close to the story route but easy to miss while focusing on the controls. |
Hard Cases
| Hard Case | Where / What to Do |
|---|---|
| Courtyard – Rear Right | After rejoining the convoy and reaching the first larger combat courtyard, clear the enemies and search the rear-right side before continuing. |
| Bridge – Under the Truck | As the convoy moves onto the bridge, check beneath/around the stopped COG truck rather than following the vehicles immediately. |
| Before the Lower-Deck Drop | Before taking the route that drops you to the lower bridge level, search the left side by the barricade for the case. |
| Roadside Crates Before the Rope/Traversal | Continue along the bridge until the next rope/traversal point. Before using it, check the roadside crates for another Hard Case. |
| Bridge Control Room – Left Side | During the objective to lower the barriers, enter the bridge control room and search the left-hand side before interacting with the objective controls or leaving. |
Supply Caches
| Supply Cache | Where / What to Do |
|---|---|
| East bridge control room | Inside the east control room reached during the barrier-lowering objective. Open it before leaving the control-room section. |
Before leaving: 3/3 Collectibles for this chapter · 5 Hard Cases from this chapter · 1 Supply Cache station.
Act 3, Chapter 5: Desperate Times
Chapter target: 5 Collectibles · 5 Hard Cases · 0 Supply Caches · 0 Secondary Objectives
Collectibles
| Collectible | Where / What to Do |
|---|---|
| Bottle of Iron Coast Beer | Enter the first apartment and check the room on the right. The bottle is near/in front of the body sitting on the sofa. |
| Portrait of Chairman Jacob Monroe | After dealing with the Wretches in the apartment hallway, look for the low opening/hole on the left and crawl through it. The portrait is in the space beyond. |
| Sanctum of the Fallen Memorial Ceremony Program | Once you reach the rooftops, inspect the area around the planters instead of immediately following the traversal route. The program is beside one of them. |
| Locust Spiked Shoulder Pad | As the route brings you back toward street level, watch for the fallen Locust body. Search the body before continuing through the next combat section. |
| Explosive Bolt | Near the top of the tower where you encounter the Locust using the Torque Bow, search the area after the fight rather than leaving immediately. The bolt is at the top of the tower. |
Hard Cases
| Hard Case | Where / What to Do |
|---|---|
| Beer / Couch Apartment Room | At the start of the chapter, enter the apartment room containing the couch and the Iron Coast Beer collectible. Search the right-hand side of the room for the case before leaving. |
| First Outdoor Fight – Left Fence | After moving outside and clearing the next combat area, hug the left fence/boundary instead of immediately following the objective. |
| Wretch Room Crawlspace | In the apartment section with Wretches, look for the low crawlspace/opening on the left. Search the space around this route for the case before continuing upward. |
| Reaver Courtyard – Left Fence | After the Reaver encounter, search the left side of the courtyard along the fence before taking the route onward. |
| Torque Bow Section – Before the Bridge | Near the later Torque Bow encounter, stop before crossing the next bridge. Check the right-hand side for the final case. |
Before leaving: 5/5 Collectibles for this chapter · 5 Hard Cases from this chapter.
Act 3, Chapter 6: Desperate Measures
Chapter target: 3 Collectibles · 5 Hard Cases · 1 Supply Caches · 0 Secondary Objectives
Act-boundary quirk: Commander's Letter Home counts toward Act 3 but is physically picked up as Act 4 begins. Do not replay Act 3 just because the journal appears one short before that pickup.
Collectibles
| Collectible | Where / What to Do |
|---|---|
| Torn Flag of Tyrus | At the outpost, move all the way to the far-right side and search beside the blocked tunnel. The torn flag is tucked beside the obstruction. |
| Morith Harbor Snow Globe | During the pursuit through the harbor area, enter the gift shop and check the desk rather than running straight through. The snow globe is sitting on the desk. |
| Commander's Letter Home | Continue until Act 4 begins. As soon as you regain control at the start of the next Act, turn left and search beside the nearby truck. Picking up the letter completes the collectible that is counted in Act 3. |
Hard Cases
| Hard Case | Where / What to Do |
|---|---|
| Fort – Left Stairs | Once you enter the Fort area, avoid pushing straight through the center. Take the left-hand stairs and search that side for the first case. |
| Upper Steps – Left Walkway | Continue upward through the Fort. At the next set of upper steps, branch onto the left walkway rather than following the central route. |
| Main Entrance – Left Barrier | Around the next entrance/gate area, search behind/along the left-side barrier before continuing the pursuit. |
| Past the Torn Flag – Left Ledge | After passing the area containing the Torn Flag of Tyrus collectible, stay left and inspect the nearby ledge/side route for another case. |
| Gift Shop – Upper Left Balcony | During the harbor/gift-shop section, go upstairs and search the upper-left balcony before leaving. The final Hard Case is on this upper level. |
Supply Caches
| Supply Cache | Where / What to Do |
|---|---|
| Gift-shop back room | In the gift shop back room during the harbor/Brumak route. Open it before leaving the gift-shop section. |
Before leaving: 3/3 Collectibles for this chapter · 5 Hard Cases from this chapter · 1 Supply Cache station.
Act 3 War Journal check
Before moving on, confirm Act 3: 36/36 Collectibles, 38/38 Hard Cases, 8/8 Supply Caches, 3/3 Secondary Objectives.
Act 4 – 41 Collectibles, 46 Hard Cases, 13 Supply Caches, 7 Secondary Objectives

Act 4 has the largest Hard Case total in the Campaign. Hope and Ruin and Tough as Nails both contain open exploration zones, while Technical Difficulties has a timed train-stop collectible.
Act 4, Chapter 1: Hope and Ruin
Chapter target: 13 Collectibles · 14 Hard Cases · 4 Supply Caches · 3 Secondary Objectives
Open-district warning: clear Missing Convoy, R.I.G.S. Experiment and Clocktower Defense before committing to the Opera House/chapter transition.
Recommended sweep: Fort Vigil → cathedral and Burial Grounds → Regalia Hotel → Cooper Commons / university → Kalona Square → Opera House and clocktower.
Secondary Objectives
| Objective | Where / What to Do |
|---|---|
| Missing Convoy | Start beneath the ground-floor arches in Cooper Commons. Accept the convoy task, defeat the Spore Matrons and remaining Locust, and stay until completion registers. |
| R.I.G.S. Experiment | Use the building behind the courtyard where Dale Maddoc's tags are found. Activate the experiment machine and defend it until the test finishes. |
| Clocktower Defense | On the road beside the Opera House, accept the defense and defeat every wave around the clocktower. Finish it before committing to the Opera House story progression. |
Collectibles
| Collectible | Where / What to Do |
|---|---|
| COG Tags of Sergeant Major Hank Rustin | These are awarded as the chapter begins, so they should already be recorded when you start exploring. |
| Message from The Coalition | From the beginning of the chapter, head down toward the memorial and inspect the memorial area rather than immediately pushing to the next objective. |
| COG Tags of Sergeant Betsy | Cross the bridge early in the chapter and turn left once you are across. Search the edge of the route for the body and tags. |
| Regalia Hotel VIP Guest List | Enter the Regalia Hotel and stop at the front desk/reception. The list is sitting in the lobby area and is easy to miss if you run straight through. |
| DISPUTE Magazine | After the cathedral section, follow the main route until you reach the interactable truck. Search behind the truck before using it/progressing. |
| Anniversary Card and Tickets | In the area with multiple Locust snipers, search the accessible building rather than only clearing the shooters. The card and tickets are inside. |
| A Handwritten Letter, in Vasgari | Move to the far-left side of the district around the market. Go all the way toward the back of that area and search the rear section for the letter. |
| COG Tags of Specialist Harrison Alexieff | While travelling toward the university, watch the side of the route for the fallen Gear. Pick up the tags before entering the next major objective area. |
| Statuette of Roman Kalona | Before the town-square objective, enter the gift shop and search inside for the statuette. |
| COG Tags of Specialist Dale Maddoc | Search along the side of the university, near the optional/side-mission area. The tags are outside the main central route. |
| Blood-Splattered Ulk Plushie | On the street leading toward the Opera House, slow down and search the street-side area rather than heading directly to the entrance. |
| Light Darker Opera Program | Inside the Opera House, reach the second-floor balcony and search the balcony area for the program. |
| COG Tags of Specialist Mei Aoi | Outside the Opera House area, follow the street to its end on the left side and inspect the fallen Gear for the tags. |
Hard Cases
| Hard Case | Where / What to Do |
|---|---|
| Opening Stairs | As soon as the chapter opens, take the stairs down on the left instead of following the main route forward. The first Hard Case is at the bottom of that short side path. |
| Sanctuary Cathedral Remains | Move into the Golden Quarter and head toward the Sanctuary Cathedral ruins in the southeast. Search the eastern side of the ruined cathedral before leaving the area. |
| Burial Grounds – East Side | Enter the Burial Grounds and work across to the eastern side. The case sits away from the direct route through the cemetery, so sweep the edge before moving on. |
| Road South of the Burial Grounds | Leave the Burial Grounds and follow the road south until it ends. At the end of the road, take the paved path on the right-hand side to reach the case. |
| Regalia Hotel – Side Reception Room | Enter the Regalia Hotel and check the small side reception room rather than staying only in the main lobby. The case is inside that side room. |
| Regalia Hotel Lobby – East Corner | Stay inside the hotel lobby and move to the eastern corner. Search beside the lobby furniture/pillars for the second hotel Hard Case. |
| Alley Northeast of Regalia Hotel | Leave the hotel and head northeast, toward the space between the hotel and the Burial Grounds. Check the small alley tucked between the buildings for the case. |
| Fountain Courtyard South of Regalia Hotel | From the hotel, move south-southwest into the courtyard with the fountain. Search around the courtyard rather than continuing immediately toward the next objective. |
| Restaurant Storeroom | In the open area southwest of the hotel, enter the restaurant in the northwest corner. Go into the storeroom/back room to find the case. |
| Coffee-Shop Side of the Plaza | Stay in the same open district and work toward the southwest side near the coffee-shop frontage. The case is outside rather than hidden inside a building. |
| Kalona University Plaza – South Corner | Go to the plaza in front of Kalona University. Search the southern corner of the plaza before heading toward Kalona Square. |
| North Gate of Kalona Square | Reach Kalona Square and move toward the northern gate. The Hard Case is near the gate, so grab it before passing through toward the Opera House side. |
| Opera House Square – Subway Entrance | In the square outside the Opera House, go to the southwest side near the subway entrance. Search beside the entrance before using any route that leaves the area. |
| Back Alley Near Highview Forum / Pool Hall | From the Highview Forum area, head east-northeast toward the Pool Hall and enter the back alley. The final chapter case is tucked along this side route. |
Supply Caches
| Supply Cache | Where / What to Do |
|---|---|
| Fort Vigil courtyard | In the starting fort courtyard by the ivy wall/plaque. Open it before leaving the fort. |
| Regalia Hotel balcony | At the Regalia Hotel balcony area. Clear it during your hotel sweep. |
| Cooper Commons arcade | Inside the arcade in Cooper Commons. Visit it while clearing the market/commons area. |
| Café beyond the iron-framed window | Inside the café reached beyond the iron-framed window in the later open-district route. |
Before leaving: 13/13 Collectibles for this chapter · 14 Hard Cases from this chapter · 4 Supply Cache stations · 3 Secondary Objectives.
Act 4, Chapter 2: Technical Difficulties
Chapter target: 2 Collectibles · 3 Hard Cases · 2 Supply Caches · 0 Secondary Objectives
Timed pickup: Sergeant Aman Landry's tags are at the first train stop. Step off, collect them and get back on before the train leaves.
Collectibles
| Collectible | Where / What to Do |
|---|---|
| COG Tags of Sergeant Aman Landry | When the train stops and you get off to fight the first Locust group, do not immediately return to the train after the fight. Search the stop area for Landry's body and collect the tags quickly before the sequence advances. |
| No. 80 Graffitied Poster | From the same train stop, head back along the tracks and take the right-hand tunnel. Watch the left wall inside the tunnel for the graffitied poster. Grab it before returning to the train. |
Hard Cases
| Hard Case | Where / What to Do |
|---|---|
| Subway – Opposite the Supply Cache | Once you enter the subway section, locate the Supply Cache and then look directly across from it. The first Hard Case is on the opposite side of the area. |
| Final Station – Small Room Above the Stairs | At the final station, go up the stairs. When the corridor turns right, ignore the turn for a moment and continue straight into the small room ahead. The case is inside. |
| Skyrail Platform | Before boarding the skyrail/monorail train, check the platform on the right-hand side of the train. Open the case before getting aboard. |
Supply Caches
| Supply Cache | Where / What to Do |
|---|---|
| Subway entrance | At the subway entrance beside the vending machines and benches, across from the first Hard Case. |
| Station Exit shutter | Under the Station Exit shutter by the compass mosaic before heading out toward the Skyrail. |
Before leaving: 2/2 Collectibles for this chapter · 3 Hard Cases from this chapter · 2 Supply Cache stations.
Act 4, Chapter 3: Tough as Nails
Chapter target: 14 Collectibles · 12 Hard Cases · 2 Supply Caches · 4 Secondary Objectives
Important: Death from Above only appears after the power-plant objective. Return to the Seradyne rooftop before the final Control Tower route.
Recommended sweep: civilian base → Freight Yard → Gavel Dockyard side missions → central rail/warehouse area → power station → return to Seradyne for Death from Above → Control Tower finale.
Secondary Objectives
| Objective | Where / What to Do |
|---|---|
| Special Cargo | At Gavel Dockyard, accept the workers task, clear the Locust, follow the active marker and open the cargo container. This also gives access to the Imulsion Blast Charge collectible. |
| Fire in the Hole | Use the raised building near the helipad east of the Control Tower. Reach the upper position, accept the task and eliminate the Locust below before moving into the later power-grid route. |
| Trapped Locust | Use the first-floor train controls in the central rail-yard building, bring the carriage over, release the trapped Locust and kill them all. Wait for completion and inspect the opened carriage for its Hard Case. |
| Death from Above | Only appears after restoring power. Return to the Seradyne/Armadillo factory rooftop, accept the task and clear the rooftop enemies before heading to the final Control Tower route. |
Collectibles
| Collectible | Where / What to Do |
|---|---|
| Young Artists Night Poster | When you first reach the open exploration area, take the first street on the left and search the walls for the event poster. |
| Maranday Apple Brandy Bottle | From the first collectible, continue toward the street farther north. Search the nearby street-side area for the bottle before heading deeper into the district. |
| COG Tags of Corporal Goran Ducaine | Go to the warehouse-like building in the northern/top part of the area. Search inside for Ducaine's body and tags. |
| A Letter Regarding Armadillos | Find the building where civilians are defending themselves. Enter the first floor and inspect the desks; the letter is on one of them. |
| COG Tags of Lance Corporal Calder Hunt | Around the train-yard side of the district, search the nearby building rather than heading straight onto the tracks. Hunt's tags are inside. |
| R.I.G. Component | Enter the empty train car in the train yard and search the carriage for the component. |
| Imulsion Blast Charge | Complete the Secondary Objective in the northeast portion of the map. The blast charge becomes obtainable as part of/after finishing that optional route. |
| Refiner's Union Jacket | After collecting the Imulsion Blast Charge, turn back toward the nearby building on the right. Go to the second floor to find the jacket. |
| COG Tags of Lieutenant Jacob Palma | Once you enter the refinery section, search the interior rather than following the objective straight through. Palma's tags are inside the refinery. |
| Severed JACK Bot Head | In the largest factory building around the center of the district, search the main interior for the severed JACK head. |
| Blurry Photo of Locust Attack | In the same central factory complex, check the small side room rather than only the large production floor. The photograph is inside. |
| COG Tags of Lance Corporal Dalia Avdol | At the broken bridge inside the factory, look for the route that requires a jump across/onto the damaged section. The tags are at the broken bridge area. |
| Seradyne Factory Closure Sign | At the factory tied to the chapter's final Secondary Objective, search the bottom floor for the closure sign before finishing the optional route. |
| Port of Kalona Docking Registry | During the chapter's final main objective, climb the tower. At the top, check the central console for the registry before interacting with anything that advances the sequence. |
Hard Cases
| Hard Case | Where / What to Do |
|---|---|
| Outside the Civilian Base | Leave the civilian base through the gate and immediately turn right. The case is outside the building opposite the green Rockwell Shipping truck. |
| Alley South of the Freight Yard | Head toward the Freight Yard in the northwest of Prospect Bay. Search the alley directly south of the yard, near the far northwest corner of the map. |
| Helipad South of the Dockyard | Go to the helipad south of the Dockyard. The Hard Case is on the pad, but opening it triggers a combat encounter, so reload and prepare before interacting with it. |
| Trapped Locust Train Car | Complete the Trapped Locust Secondary Objective. After using the controls and clearing the Locust from the train carriage, enter/search the now-open train car for the Hard Case. |
| Prospect Bay Mechanics Garage – Back Room | In the center of Prospect Bay, just southwest of the Power Grid Station, enter the vehicle mechanics garage filled with COG vehicles. Open the back room to reach the case; be ready for the ambush triggered when you enter. |
| Catwalk North of the Mechanics Garage | From the previous garage, go north into the alley, climb onto the trucks and use them to reach the elevated catwalk. Follow the catwalk around to the case. |
| Adjoining Warehouse | From the catwalk case, continue into the connected/adjoining warehouse rather than dropping back to the street. Search the interior for the next case. |
| Warehouse Rooftop South-Southeast of Civilian Base | Find the large group of warehouses south-southeast of the civilian base. Get onto the roof and work all the way toward the rear of the rooftop to find the case. |
| North Wing Armory – Southeast Corner | Enter the North Wing Armory west of Seradyne Manufacturing. In the southeast corner, climb the ladder to the upper level and open the case there. |
| Warehouse Balcony | In the central warehouse cluster, look for the outside balcony between the buildings. Reach the balcony from the nearby interior/catwalk route and search it for the case. |
| Weapons Warehouse – Southwest Corner | When the main objective takes you through the weapons warehouse, search the southwest corner before completing the objective and leaving the building. |
| Outside the Power Plant | After arranging safe passage out of the weapons warehouse, follow the exit route toward the Power Plant. Before leaving the chapter area, check beside the truck outside the Power Plant for the final case. |
Supply Caches
| Supply Cache | Where / What to Do |
|---|---|
| Warehouse from the district ramp | Inside the warehouse reached from the district ramp during the Prospect Bay sweep. |
| Power station | At the foot of the metal stairs at the power station. Open it before finishing the power-station route. |
Before leaving: 14/14 Collectibles for this chapter · 12 Hard Cases from this chapter · 2 Supply Cache stations · 4 Secondary Objectives.
Act 4, Chapter 4: Signals
Chapter target: 5 Collectibles · 5 Hard Cases · 0 Supply Caches · 0 Secondary Objectives
Collectibles
| Collectible | Where / What to Do |
|---|---|
| Infinity Mints | Stop at the chapter's only gas station and search the station before moving on. |
| Signed Kalona Eagles Cap | On the way toward the communications tower, go below the bridge and search the lower area for the signed cap. |
| Photo of Lucas and His Friends | Once inside the communications tower, search the rooms/interior rather than going immediately to the objective equipment. |
| Lucas' Handheld Radio | The radio is also inside the communications tower, close to the same interior section as the photograph. Make sure you have both before leaving. |
| Pair of Binoculars | After finishing the tower section, follow the bridge/exit route and search along the bridge before committing to the next transition. |
Hard Cases
| Hard Case | Where / What to Do |
|---|---|
| Gas Station – Van | At the gas station where the first fight takes place, move to the back-right corner of the area and search inside the van for the case. |
| Gas Station Roof | After clearing the snipers, climb onto the roof of the gas station where they were positioned. The second case is up there. |
| Electrical Substation | During the second major combat encounter, search the electrical substation area thoroughly before continuing toward the radio tower. |
| Radio Tower Compound – Left Side | Once you get through the gate into the radio-tower compound, head left outside the main building. The case is along that side of the compound. |
| Radio Tower Compound – Back Left | Stay outside the radio-tower building and continue around to the back-left side. The final Signals Hard Case is near the rear of the compound. |
Before leaving: 5/5 Collectibles for this chapter · 5 Hard Cases from this chapter.
Act 4, Chapter 5: Paths Diverge
Chapter target: 2 Collectibles · 4 Hard Cases · 4 Supply Caches · 0 Secondary Objectives
Recommended sweep: opening street → Auntie's route → train yard → factory upper rooms → Seradyne Administration → Brumak arena.
Collectibles
| Collectible | Where / What to Do |
|---|---|
| COG Tags of Lance Corporal Aniyah Musa | As soon as the chapter starts, turn left before following the squad/objective. Search the immediate area for the body and tags. |
| COG Tags of Lance Corporal Ava Wilson | Later, while moving toward the reactor in the final part of the chapter, watch the route for Wilson's body and collect the tags before entering the reactor objective area. |
Hard Cases
| Hard Case | Where / What to Do |
|---|---|
| Prospect Bay Power Station – North Corner | Inside the Power Station, go to the rear/northern corner rather than following the objective straight through. The case is tucked into that back section. |
| Reaver Fight Area – Burnt Van | After defeating the Reaver, do not leave the combat area immediately. Go to the southern corner near the burnt-out grey van to find the case. |
| Gavel Dockyard Supply Cache Room | In the eastern part of the Gavel Dockyard, enter the Supply Cache room and search inside for the Hard Case. |
| After the Chapter Boss | Once the final boss is defeated, follow the route out but watch the east wall. The last Hard Case is along the exit path before you leave the area. |
Supply Caches
| Supply Cache | Where / What to Do |
|---|---|
| Auntie's roadside pickup | At the roadside pickup around Auntie's route early in the chapter. |
| Entrance cabinet by stacked crates | Inside the entrance area, in the cabinet beside the stacked crates. |
| Office beneath the clocks | Inside the office beneath the clocks on the train-yard/factory route. |
| Seradyne Administration blue cabinet | Inside the Seradyne Administration building, in the blue cabinet after passing through the glass doors. |
Before leaving: 2/2 Collectibles for this chapter · 4 Hard Cases from this chapter · 4 Supply Cache stations.
Act 4, Chapter 6: Critical Failure
Chapter target: 5 Collectibles · 8 Hard Cases · 1 Supply Caches · 0 Secondary Objectives
Point of no return: collect Dalia Fabbri's Research Journal, the final Hard Cases and the last Supply Cache before triggering the refinery boss encounter.
Collectibles
| Collectible | Where / What to Do |
|---|---|
| Bust of Allfather Decha Timgad | As soon as you enter the refinery, search the entry section before moving deeper into the facility. |
| Damaged Gas Mask | In the refinery's open area, before entering the tunnel, search the surrounding ground/debris for the mask. |
| Tyran Business Monthly | After reuniting with the other squad members, check the small room on the left before continuing. The magazine is inside. |
| Memorandum to Dr. Elliot | During the required office section, search the office itself before leaving. The memorandum is on the story route but easy to ignore while following the squad. |
| Dalia Fabbri's Research Journal | In the final room before the boss fight, stop and search the room before triggering the next encounter. Pick up the journal first so you do not have to replay the ending section. |
Hard Cases
| Hard Case | Where / What to Do |
|---|---|
| Refinery Reception | As soon as you enter the refinery, stop at reception. The Hard Case is to the left of the reception desk, so grab it before moving deeper into the facility. |
| Elevator Roof | When the elevator brings you up to the rooftop section, climb onto the roof of the elevator itself. The case is sitting on top. |
| Reaver Drop-Off Platform | Later, when a Reaver drops four Locust onto a platform after communications are lost, clear the fight and move onto the same platform where the enemies were dropped. The case is there. |
| Keycard Fight Room – Right Side | After obtaining the keycard, you reach a large room where another fight begins. Before entering the center of the room, look to the right for the case. |
| Room Beyond the Fight – Floor Opening | Cross the large fight room and enter the room on the opposite side. Go to the far end near the large hole in the floor to find the case. |
| Corridor After the Blue COG Room | After finding the dead COGs in the blue room, enter the next corridor. When the route tells you to turn left, continue straight instead into the small room at the end. The case is on the right inside. |
| Lightmass Missile Plans Control Room | In the control-room section where Marcus comments on the missile plans displayed on the wall, search the back-right corner before moving on. |
| Opposite the Final Supply Cache | In the next room, locate the Supply Cache and then look directly opposite it for the final Act 4 Hard Case. |
Supply Caches
| Supply Cache | Where / What to Do |
|---|---|
| Final refinery room | In the final refinery room beneath the WARNING sign, immediately before the last encounter. Open it before triggering the boss sequence. |
Before leaving: 5/5 Collectibles for this chapter · 8 Hard Cases from this chapter · 1 Supply Cache station.
Act 4 War Journal check
Before moving on, confirm Act 4: 41/41 Collectibles, 46/46 Hard Cases, 13/13 Supply Caches, 7/7 Secondary Objectives.
Act 5 – 12 Collectibles, 5 Hard Cases, 4 Supply Caches, 0 Secondary Objectives

Act 5 is much lighter on optional content. All five Hard Cases are finished by the end of Ghost Town; the final four Supply Cache stations are in Resolute and The Fall of Kalona.
Act 5, Chapter 1: One Problem at a Time
Chapter target: 1 Collectibles · 2 Hard Cases · 0 Supply Caches · 0 Secondary Objectives
Point of no return: collect the second train-yard Hard Case before boarding the next train.
Collectibles
| Collectible | Where / What to Do |
|---|---|
| COG Tags of Private Lorin Galvin | After the train sequence ends and you are back on foot, follow the route toward the next objective. Before entering the park area, look to the left and search the body on the ground for the tags. |
Hard Cases
| Hard Case | Where / What to Do |
|---|---|
| East Kostra Train Yard – Wire Fence | After the first train sequence, enter the East Kostra Exchange Station grounds through the broken wall. Head left through the yard. Before the route forces you down onto the tracks, look for the metal wire fence cutting across the middle of the yard. The Hard Case is pressed against that fence. |
| Train Yard – Back-Right Corner | Continue through the train-yard fight but do not board the next train immediately afterward. Sweep the back-right side of the yard/platform area first. The second case is tucked into that far corner before the boarding point. |
Before leaving: 1/1 Collectibles for this chapter · 2 Hard Cases from this chapter.
Act 5, Chapter 2: Ghost Town
Chapter target: 3 Collectibles · 3 Hard Cases · 0 Supply Caches · 0 Secondary Objectives
Collectibles
| Collectible | Where / What to Do |
|---|---|
| COG Tags of Specialist Wallace Teale | As soon as the chapter begins, turn left toward the containers instead of following the objective. Search the body beside the containers for the tags. Do this immediately so you do not forget it once the chapter gets moving. |
| Clinical Test Trial Medication | When the route takes you through the hospital, go to the second floor and search around the surgery/medical room. The medication is sitting on a desk inside the hospital. |
| COG Tags of Master Sergeant Joseph Kopec | During the escape through Landa Courts Apartment, continue upward until you reach the top-floor section. Look for the burning room with a body sitting in a chair. Search the body for Kopec's tags before continuing the escape. |
Hard Cases
| Hard Case | Where / What to Do |
|---|---|
| Downtown Kalona Street | When you return to the downtown streets, move forward instead of immediately searching the side routes. The Hard Case is straight ahead as you enter the street section, near the damaged vehicles/fencing. |
| Left Branch Near Discount Drugstore | Continue until the route splits. Take the left branch and follow it uphill/to the end rather than staying with the main objective. The case is near the Discount Drugstore at the end of that side route. |
| Under the Bridge After Mortar Fire | During the mortar-fire section, keep moving until the route drops you beneath the bridge/overpass. After the drop, look straight ahead beside the truck for the final Hard Case. |
Before leaving: 3/3 Collectibles for this chapter · 3 Hard Cases from this chapter.
Act 5, Chapter 3: Storm Clouds
Chapter target: 0 Collectibles · 0 Hard Cases · 0 Supply Caches · 0 Secondary Objectives
There are no items from the four 100% completion categories in this chapter. Play through normally and continue to the next chapter.
Before leaving: no completion-category cleanup required.
Act 5, Chapter 4: Resolute
Chapter target: 5 Collectibles · 0 Hard Cases · 3 Supply Caches · 0 Secondary Objectives
Point of no return: climb to the top of the crane for the Kalona Skyline Sketch before pressing the green button/advancing the final crane sequence.
Recommended sweep: lower deck → command room → workshop → lift room → Zee escort → Raven Nest walkway → crane.
Collectibles
| Collectible | Where / What to Do |
|---|---|
| COG Tags of Lieutenant Enola Tabaaha | Just before entering the room where you meet Michaelson, turn left instead. Search the nearby body for Tabaaha's tags before walking into the meeting room. |
| Captain's Log, CNV Resolute | Inside the room where you meet Michaelson and the other high-command members, search the room before moving on. The Captain's Log is on a shelf/cabinet in the corner. |
| CNV Resolute Decommissioning Plans | Follow the main objective until you enter a workshop-like room. Crawl beneath the generator, then check the table on the other side for the plans. |
| COG Tags of Lieutenant Arthur Palarmo | During the section where you are escorting Zee, climb the required ladder. Once you reach the top, turn around and look back across the ladder area and search the nearby body for Palarmo's tags. |
| Sketch of the Kalona Skyline | In the chapter's final crane area, climb all the way to the top of the crane. Search the desk at the top for the sketch before leaving the area. |
Supply Caches
| Supply Cache | Where / What to Do |
|---|---|
| Command room | In the red-lit command room with the Captain's Log, where you meet Michaelson. |
| Lift room | Inside the interior lift room after the Decommissioning Plans section. |
| Raven Nest upper walkway | On the upper walkway above the drydock, before the late chapter traversal. |
Before leaving: 5/5 Collectibles for this chapter · 3 Supply Cache stations.
Act 5, Chapter 5: The Fall of Kalona
Chapter target: 3 Collectibles · 0 Hard Cases · 1 Supply Caches · 0 Secondary Objectives
Finale note: Bryce Valen's tags and Carlos Santiago's Tags/Photo are awarded automatically through the ending sequence. Do not search the map for separate pickups.
Collectibles
| Collectible | Where / What to Do |
|---|---|
| COG Tags of Sergeant Alton Hau | When you return to the bridge covered with impaled bodies — the same bridge seen earlier in the Campaign — search the bodies as you cross. The tags are near a broken, burning vehicle. Pick them up before continuing. |
| COG Tags of Sergeant Bryce Valen | This collectible is awarded automatically after defeating the final boss. There is no separate pickup to search for. |
| Carlos Santiago's COG Tags and Photo | This final collectible is awarded automatically after completing the game and reaching the ending. |
Supply Caches
| Supply Cache | Where / What to Do |
|---|---|
| Bridge colonnade | In the opening bridge colonnade near the kiosk/checkpoint. Open it while collecting Sergeant Alton Hau's tags. |
Before leaving: 3/3 Collectibles for this chapter · 1 Supply Cache station.
Act 5 War Journal check
Before moving on, confirm Act 5: 12/12 Collectibles, 5/5 Hard Cases, 4/4 Supply Caches.
Final 100% Check
When the credits finish, the Campaign totals should be:
| Category | Final total |
|---|---|
| Collectibles | 140/140 |
| Hard Cases | 125/125 |
| Supply Cache stations | 36/36 |
| Secondary Objectives | 17/17 |
If one counter is short, do not replay random chapters. Use the Act total first, then use the chapter counts in this guide to narrow the missing item down.
For a missing standard collectible, the War Journal gives you the cleanest chapter-level clue. For Hard Cases, use the Act total and compare the Hard Case rewards/mods at a Supply Cache against the relevant Act guide. For Secondary Objectives, the only possible chapters are Hold the Line, Last Foothold, Hope and Ruin, and Tough as Nails.
If a counter is visibly wrong despite the detailed list showing everything found, you may be hitting the current Campaign tracking bug rather than a genuinely missed location.
Related E-Day Guides
For a single category instead of the full route: