Gears of War: E-Day Act 3 Collectibles Guide – All 36 Locations
Find all 36 collectibles in Gears of War: E-Day Act 3 with chapter-by-chapter locations, missable warnings, side-mission requirements and an efficient route.
Gears of War: E-Day Act 3 Collectibles Guide – All 36 Locations
Act 3 contains 36 collectibles spread across six chapters. Most of the Act is fairly linear, but Chapter 3: Last Foothold opens back up and contains 14 collectibles, including items tied to optional areas and Secondary Objectives.
Collectibles count toward Memories From E-Day, which requires all 140 Campaign collectibles. You can check what you are missing through the War Journal and replay chapters later, so a missed item does not permanently lock you out of 100% completion.
| Chapter | Name | Collectibles |
|---|---|---|
| 1 | Stranded | 5 |
| 2 | Enemy Lines | 6 |
| 3 | Last Foothold | 14 |
| 4 | The Convoy | 3 |
| 5 | Desperate Times | 5 |
| 6 | Desperate Measures | 3 |
| Total | 36 |
Important: the final Act 3 collectible, Commander's Letter Home, is credited to Act 3 even though you physically pick it up at the beginning of Act 4. If your War Journal appears one short after finishing Chapter 6, continue into Act 4 before assuming you missed something.
For the safest run, listen for the collectible audio cue, watch for the brief on-screen alert/controller vibration, and check the War Journal before leaving a chapter. In the more open sections, getting close to an item can also make it easier to track on the map.
Act 3 Chapter 1: Stranded – 5 Collectibles
This chapter takes Bravo through the wooded area toward Fairlight. The COG Army Knife is the one to be most careful with because progressing down the story route can prevent you from climbing back to it without replaying the chapter.
| # | Collectible | How to Find It |
|---|---|---|
| 1 | COG Army Knife | After reaching the first badly mauled body beyond the small campsite, do not immediately follow the story route downhill. Continue into the trees and search around the base of the nearby trees for the knife. Grab it before dropping to the lower route because you cannot simply climb back up. |
| 2 | Fairlight Rifle Range Sign | After vaulting the tall fence into the military vehicle/training area, sweep the perimeter beside the tank and inner fencing. The rifle-range warning sign is mounted along the edge of the compound rather than on the main path. |
| 3 | Gut-Puncher Grenade Rounds | Inside the Fairlight vehicle/airfield area, locate the first Supply Cache. The collectible is beside the cache, so check the ground and nearby equipment before moving on. |
| 4 | UIR Soldier Shooting Target | When you reach the substation used to restore power/light for the helipad, do not enter the building immediately. Follow the outside edge toward the fence and look for the broken shooting target leaning against machinery. |
| 5 | Prepper's Scavenging Map | In the same substation area, search between the large generator/electrical units near the entrance side of the compound. The map is tucked low between two pieces of equipment and is easy to walk past. |
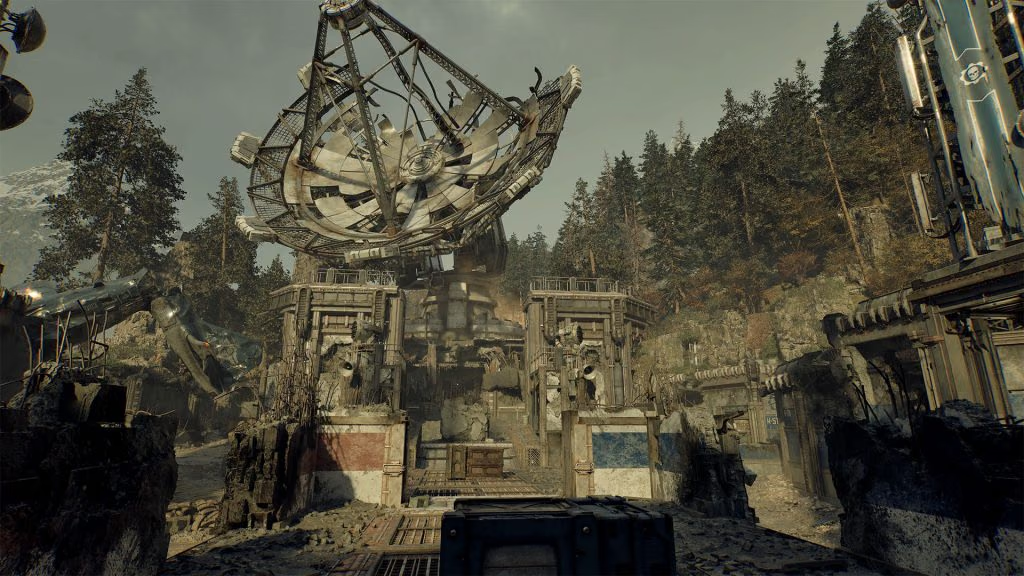
Before leaving Stranded, check that the War Journal shows 5/5. The first collectible is the only one here with a particularly awkward one-way transition.
Act 3 Chapter 2: Enemy Lines – 6 Collectibles
Enemy Lines is linear, but several collectibles deliberately sit on wrong-way tunnels or side paths. The safest rule is to investigate the red-lit branches around the subway and rail sections before following the objective marker.
| # | Collectible | How to Find It |
|---|---|---|
| 1 | Damaged Gnasher Shotgun | Early in the underground section, before pushing deeper into the next red-lit area, check the side tunnel off the main route. The damaged Gnasher rests on blue military cases/crates. |
| 2 | Parchment and Powder Pouch | At the first proper Locust camp underground, inspect the supplies on the left side instead of walking straight through. The parchment and pouch are mixed in with the Locust equipment and weapons. |
| 3 | Parchment with Indecipherable Writing | After clearing the old subway station, move toward the far side of the room but stop before taking the stairs toward the objective. Search the back-right wall / area below the stairs for the parchment. |
| 4 | COG Tags of Private Beth Avila | When Marcus comments about climbing around the trains, look toward the destroyed train beside the red-lit section. Circle the wreck and continue into the darker area behind it to find the body and tags. |
| 5 | Maintenance Worker's Bloodied Flashlight | From Beth Avila's tags, head the opposite direction through the intact station and follow the other set of tracks into the red-lit wrong-way tunnel. Marcus comments about the bad air/wrong direction. Continue a little farther and check the ground for the flashlight. |
| 6 | COG Tags of Private First Class Erick Davis | After seeing the huge Locust force in the tunnels, you eventually reach the enormous sewer/stormwater basin. Circle the basin and look for a corpse beside a Supply Cache to collect the tags. |
If the War Journal does not show 6/6, the two most likely misses are Beth Avila's tags behind the destroyed train and the flashlight in the intentionally wrong-way tunnel.
Act 3 Chapter 3: Last Foothold – 14 Collectibles
Last Foothold is the main cleanup chapter of Act 3. Once the city opens up, do not rush the final objective. Work through the outposts, hospital, river, hotel/police area and side missions first.
Two collectibles deserve special attention: Damaged Heavy Locust Helmet requires the optional park route, while Blade-like Projectiles are tied to the later Secondary Objective that becomes available after the new flying enemy encounter.
| # | Collectible | How to Find It |
|---|---|---|
| 1 | COG Tags of Sergeant First Class Robin Hamill | As soon as you return to the city, locate the large glowing Emergence Hole. The body with the tags is close to the hole, before the area fully opens up. |
| 2 | COG Tags of Corporal Tracy Moore | After moving through the transit/rail section, keep left and climb into the broken-open apartment building. Search the rear room of the exposed apartment for the tags. |
| 3 | Colonel Trench's VIP List | At the small COG outpost, search the tents rather than immediately leaving with the squad. The VIP list is on a desk in the camp area. |
| 4 | COG Tags of Private Luis Garcia | When moving out with the next COG group, you reach a red-lit area before another firefight. Circle the rock, move uphill and keep right toward the worn military tent. The tags are on the ground there. |
| 5 | Captain Grey's Field Journal | At the later COG camp/field hospital where the squad reconnects with leadership, inspect the tables near the computers. The open field journal is sitting on one of the desks. |
| 6 | Landa Memorial Hospital Evacuation Order | Clear the hospital/ER area and return to the entrance/front-desk zone. Check the reception/whiteboard area for the evacuation document. |
| 7 | COG Tags of Specialist Rachel Carnahan | Inside Landa Memorial Hospital, go to the upper floor of the emergency wing. Look for the body near the snack/vending-machine area by a doorway. |
| 8 | COG Tags of Private Terrance Sander | During the civilian-defense section around the loading-bay/police-building area, search the building rather than leaving immediately after the fighting. The tags are on a fallen Gear inside/near the entrance area. |
| 9 | COG Tags of Private Oded Bay | Return to the bloody fountain previously used by the Locust as a gruesome message. Search the fountain itself for the tags. |
| 10 | Locust Pistol Ammunition | Follow the riverside route toward the hotel area and inspect the bodies along the water. The ammunition collectible lies with a dead Locust. |
| 11 | COG Tags of Specialist Bernard Havelock | Find the damaged transit/monorail car. Use the nearby vehicle/hood to climb into the wrecked carriage, then search the body inside for the tags. |
| 12 | COG Tags of Private First Class John Carnahan | Around the southeastern shelter/hotel section, check the outside wall of the building instead of only following the street. The body is slumped against the wall near the route to the final objective. |
| 13 | Damaged Heavy Locust Helmet | Start the Secondary Objective that opens the park while searching for the missing person/friend. Clear the enemies, then move through the western side/gate of the park and inspect the dead heavy Locust/Boomer for the helmet. |
| 14 | Blade-like Projectiles | After defeating the new flying enemy during the main route, start the later Secondary Objective near the hospital. Open the blocked gate and climb the stairs; the projectiles are on a body on the intermediate level before reaching the side-mission objective itself. |
The easiest way to avoid a replay is to finish both side-mission-related collectibles before committing to the chapter's final objective. If you are missing exactly one item, check the park and hospital-side optional route first.
Act 3 Chapter 4: The Convoy – 3 Collectibles
All three sit close to the main route, but the chapter moves quickly and combat can pull your attention away from them.
| # | Collectible | How to Find It |
|---|---|---|
| 1 | COG Tags of Private Rudy Bartholomew | After the first combat encounter, move into the left lane and backtrack slightly instead of staying with the convoy. Look for the body beside a burning vehicle. |
| 2 | Locust Crest | After the first major bridge fight and after lowering the bridge, search beside the crashed police vehicle near the Locust body before rejoining the convoy. |
| 3 | COG Tags of Corporal Kevin Garbor | Inside the bridge control room used to lower the barrier, check the center of the room/floor before leaving. The tags are very close to the story route but easy to miss while focusing on the controls. |
Act 3 Chapter 5: Desperate Times – 5 Collectibles
This chapter takes you through apartments, rooftops and back down toward street level. The collectibles generally follow that same vertical route.
| # | Collectible | How to Find It |
|---|---|---|
| 1 | Bottle of Iron Coast Beer | Enter the first apartment and check the room on the right. The bottle is near/in front of the body sitting on the sofa. |
| 2 | Portrait of Chairman Jacob Monroe | After dealing with the Wretches in the apartment hallway, look for the low opening/hole on the left and crawl through it. The portrait is in the space beyond. |
| 3 | Sanctum of the Fallen Memorial Ceremony Program | Once you reach the rooftops, inspect the area around the planters instead of immediately following the traversal route. The program is beside one of them. |
| 4 | Locust Spiked Shoulder Pad | As the route brings you back toward street level, watch for the fallen Locust body. Search the body before continuing through the next combat section. |
| 5 | Explosive Bolt | Near the top of the tower where you encounter the Locust using the Torque Bow, search the area after the fight rather than leaving immediately. The bolt is at the top of the tower. |
Act 3 Chapter 6: Desperate Measures – 3 Collectibles
The first two are in Chapter 6 itself. The third is unusual: Commander's Letter Home counts in the Act 3 total but is picked up immediately after Act 4 begins.
| # | Collectible | How to Find It |
|---|---|---|
| 1 | Torn Flag of Tyrus | At the outpost, move all the way to the far-right side and search beside the blocked tunnel. The torn flag is tucked beside the obstruction. |
| 2 | Morith Harbor Snow Globe | During the pursuit through the harbor area, enter the gift shop and check the desk rather than running straight through. The snow globe is sitting on the desk. |
| 3 | Commander's Letter Home | Continue until Act 4 begins. As soon as you regain control at the start of the next Act, turn left and search beside the nearby truck. Picking up the letter completes the collectible that is counted in Act 3. |
Once the letter is collected, the Act 3 War Journal should show 36/36.
For the other completion categories, use our E-Day Collectibles, Hard Cases, Supply Caches & Secondary Objectives guide, or return to the Gears of War: E-Day guide hub.